
Introduction
Online Payment Platform (OPP) is an end-to-end payment solution with a set of flexible API's designed to support platforms and marketplaces. Allowing a platform to seamlessly onboard new business and consumer merchants enabling them to accept payments on the platform while processing the money in flexible ways to sellers and service providers.
Usecases:
- Marketplaces, like Ebay or Amazon
- Rental, like Airbnb
- Subscription, like Zuora
- Events, like Eventbright
- Ticketing, like Ticketscript or Booking.com
- Education, like universities or highschools
- Services, like Uber or JustEat
- Invoicing, like Exact or Zoho
- and many more...
This guides consist of the following chapters:
- Onboarding: How to onboard a merchant, what possibilities are there, and how does compliance influence everything.
- Compliance: What is compliance, why is it needed and how does it influence my payment flows?
- Transactions: How to start a transaction, and how to handle the unhappy flows.
- Dashboarding: How to create your own dashboard for merchants, and for yourself.
Let's get started!
Before we start, have a look at our terminology, to make sure you understand every word we say.
For each receiver of the money, the partner (platform) is required to create a merchant within OPP. A merchant can be a business or a consumer. Depending on the type of merchant, these have to go through different verifications before they can receive money. It is important to note that transactions can be initiated for a merchant before they are required to finalize any verifications, but it is up to you whether you want to provide this possibility.
These verifications are required for processing payments because as a Payment Service Provider we are obliged to know to whom payments are made. For example to prevent money laundering and the financing of terrorism.
Merchants can be created using our Seamless Merchant onboarding. Seamless onboarding allows you to onboard merchants (business or consumer) seamlessly from within your platform environment through API onboarding.
Advantages
- Seamless integration
- More flexibility with the user experience
- Highest onboarding conversion
As a partner you can simply create an underlying merchant using the minimal requirements: their emailaddress and phonenumber.
Once a new merchant has been created you will receive a Merchant UID which is the unique identifier for this user. You will need to save the Merchant UID and use it to, amongst other things, create transactions for this merchant.
How will payouts work for this merchant?
After creating a merchant, it is immediately possible to start a transaction. Transactions can be created and successfully paid to a merchant of whom only the e-mail address has been verified. However funds cannot be paid out to the merchant until they have successfully finished the onboarding process and its compliance requirements.
- Read more about payouts
- Read how to onboard a Consumer Merchant with our Seamless onboarding
- Read how to onboard a Business Merchant with Seamless onboarding
Merchant Onboarding
Every user who sells a product or service and is earning money while doing this, needs to be onboarded as a merchant. This can either be a business, or consumer. We will seperate both flows, because a business merchant requires more additional information than a consumer merchant does. Creating and onboarding merchants can be done using our Merchant API.
Consumer onboarding
For onboarding a consumer merchant we offer a tiered verification process (Low KYC and High KYC). Low KYC means that only a verified bank account is needed in order to be able to receive payouts. The standard thresholds for Low KYC merchants are € 250,- in one transaction or € 1.500,- in lifetime volume. If one of these thresholds is reached the consumer is required to identify him- or herself before payouts can be reactivated. The threshold can be adjusted based on the risk profile and assessment of the platform or marketplace.
As soon as a merchant is created, you can start doing transactions. As a partner, you are in charge of when the merchant fulfills the verification requirements. In many cases the partner wants the merchant to perform the least number of actions as possible in the beginning, but in some cases the partner may wish to force the consumer to perform all KYC steps before transactions can be started. Both options are possible, and completely up to you.
The four steps of consumer merchant creation are:
- Create a consumer merchant.
- Create a
bank_account. - Verify consumer bank account (Low KYC).
- Consumer ID verification (High KYC).
1. Create a consumer merchant
1.1 Example request
POST https://api-sandbox.onlinebetaalplatform.nl/v1/merchants
{
  "country": "nld",
  "emailaddress": "email@domain.com",
  "phone": "0612345678",
  "notify_url": "https://platform.com/notify"
}
The example request allows you to create a consumer merchant.
The minimal required fields are: country, emailaddress, phone and notify_url.
The emailaddress is our unique identifier. You cannot create multiple merchants with the same email address.
Please note that the phonenumber is not required by the API. You are free to leave this out when creating the merchant, but the merchant will need to provide the phonenumber in a later stage. See 5. Fulfill other requirements.
The notify_url is the webhook URL used by OPP for notifications of status changes.
1.2. Example response
{
    "uid": "{{merchant_uid}}",
    "object": "merchant",
    "created": 1554113700,
    "updated": 1554113700,
    "status": "pending",
    "compliance": {
        "level": 100,
        "status": "verified",
        "overview_url": "https://sandbox.onlinebetaalplatform.nl/en/{{partner_slug}}/{{merchant_uid}}/{{hash}}/overview",
        "requirements": []
    },
    "type": "consumer",
    ...
}
As a partner you will receive the Merchant Object with compliance.level
100 as a response.
Please note, in case you decided together with your Implementation manager on a different compliance level when creating merchants, this might differ for you.
1.3. Actions
The merchant object contains three fields that you will need to save in your database:
merchant_uid- The Merchant UID, this is the unique identifier of the created merchant.status- The merchant account status.compliance.status- The compliance status of the merchant. This status will define whether the merchant will be able to receive payouts.
Ofcourse, other values can be saved in your database as well, if that is preferred by you. However, these three values are important for the flows in your platform.
After the creation of the merchant, it is immediately possible as a partner to create transactions for this merchant. The funds of the paid transactions cannot (yet) be paid out because the merchant does not yet have a linked bank account.
2. Create a bank account - Consumer
2.1 Example request
POST https://api-sandbox.onlinebetaalplatform.nl/v1/merchants/{{merchant_uid}}/bank_accounts
{
    "return_url": "https://platform.example.com/return",
    "notify_url": "https://platform.example.com/notify"
}
With this request you can create an 'empty' bank account for the merchant.
This 'empty' bank account serves as a container that needs to be filled with verified bank account information.
The bank account is created with a status of new and needs to be verified by the merchant.
2.2. Example response
{
    "uid": "{{bank_account_uid}}",
    "object": "bank_account",
    "created": 1554200096,
    "updated": 1554200096,
    "verified": null
    "verification_url": "https://onlinebetaalplatform.nl/nl/
     {{partner_name}}/merchants/{{merchant_uid}}/verificatie/
     bankgegevens/{{bank_account_uid}}/7a8d3c308b0739ef96320720017d070533912548",
    "status": "new",
    "account": {
        "account_iban": null
    },
    "bank": {
        "bic": null
    },
    "reference": null,
    "return_url": "https://platform.example.com/return",
    "notify_url": "https://platform.example.com/notify",
    "is_default": true
}
As soon as a bank account has been created for the merchant, the compliance.level of the merchant will immediately be increased to 200.
You will receive the merchant.compliance_level.changed notification of this change on the merchant's specified notify_url.
Because the level has been increased, you can now also find the bank_acount.verification.required within the compliance.requirements. The verification_url that can be found in the response of the bank_account object is the same URL that is detailed in the compliance requirement.
2.3. Actions
Redirect the merchant to the verification_url.
Optionally, you can save the UID and verification_url in your database.
3. Verify consumer bank account
In the previous step we created an 'empty' bank account for the consumer merchant. To verify the bank account, we can follow five routes:
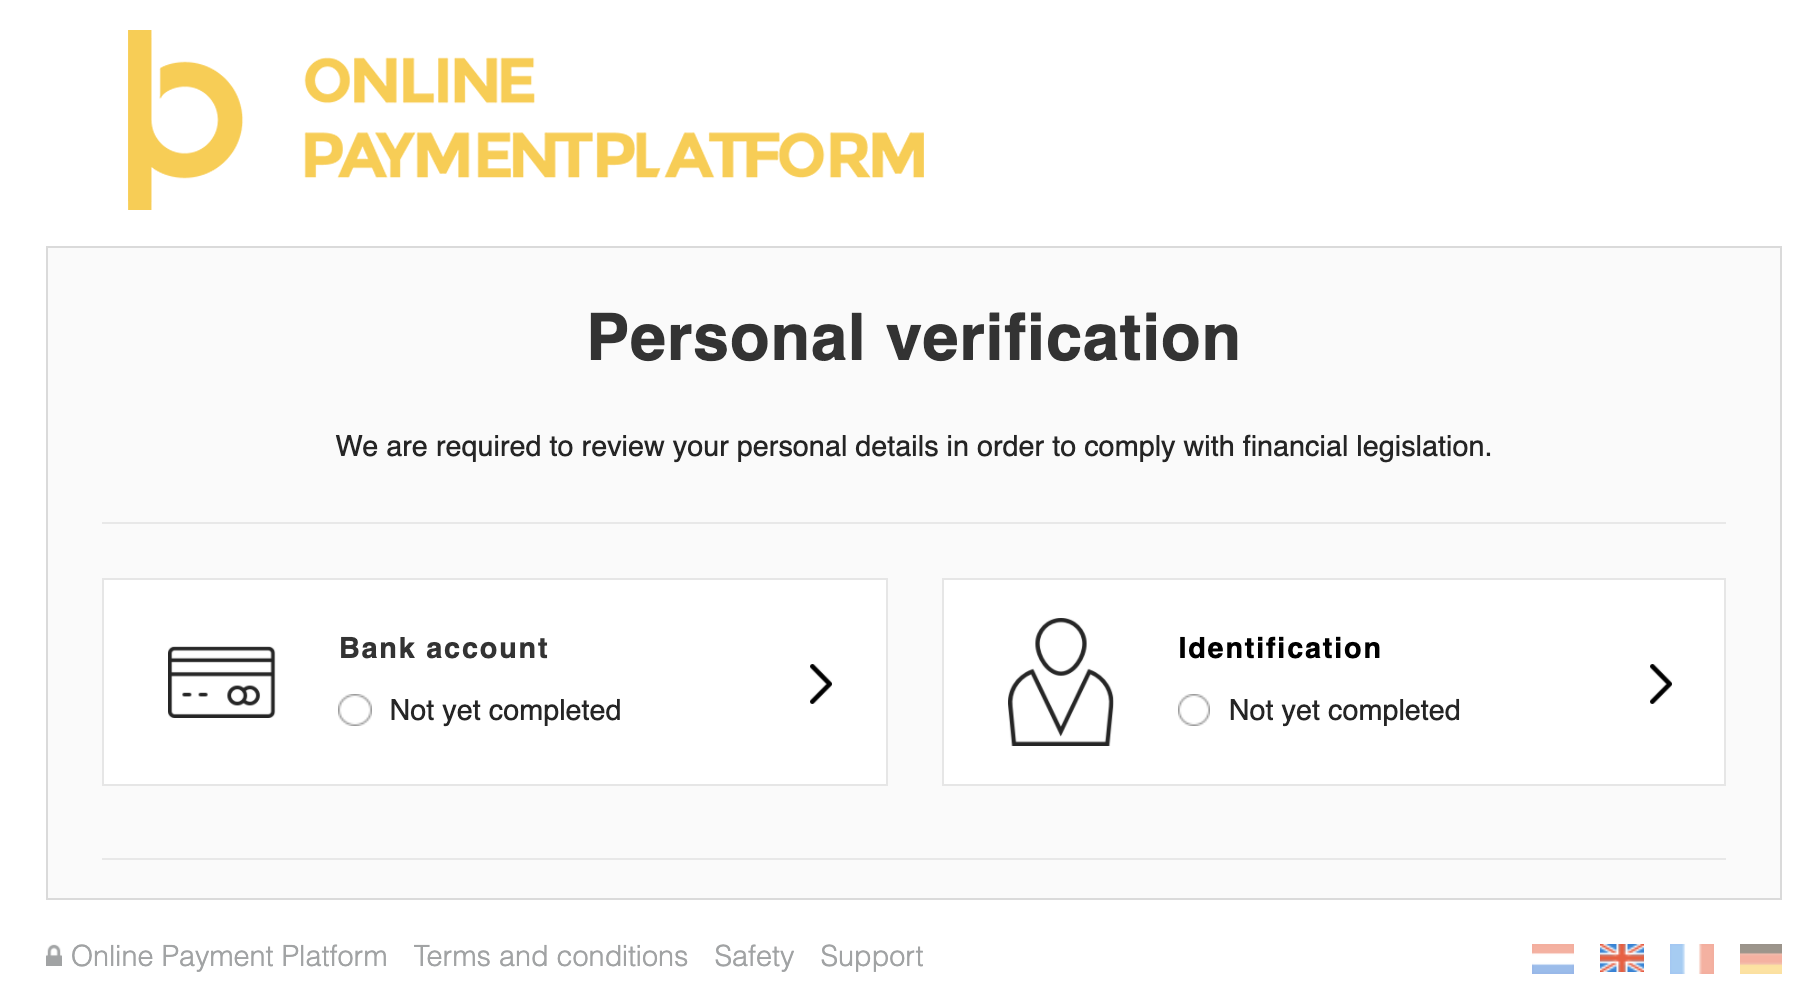
- Use the compliance overview_url.
- Use the verification_url.
- Use the seamless bank integration.
- Verify using the Files API.
- Perform a transaction (buyer onboarding).
In all cases OPP will send a notification right after the verification took place. The compliance requirement bank_account.verification.required and the bank
account status will be pending until OPP has performed a compliance check.
3.1. Verify the bank account by redirecting the merchant to the compliance overview_url
You can find the overview_url in the merchant compliance object. Find the overview_url in the compliance object within the merchant and redirect the user to this url.
{
    "uid": "{{merchant_uid}}",
    "object": "merchant",
    ...
    "compliance": {
        "level": 200,
        "status": "unverified",
        "overview_url": "https://sandbox.onlinebetaalplatform.nl/en/{{partner_slug}}/{{merchant_uid}}/15c0bdb17283475ec5f274cad0a2a0245dda11ff/overview",
        "requirements": [
            {
                "type": "bank_account.verification.required",
                "status": "unverified",
                "object_type": "bank_account",
                "object_uid": "{{bank_account_uid}}",
                "object_url": "https://api-sandbox.onlinebetaalplatform.nl/v1/merchants/{{merchant_uid}}/bank_accounts/{{bank_account_uid}}",
                "object_redirect_url": "https://sandbox.onlinebetaalplatform.nl/nl/{{partner_name}}/merchants/{{merchant_uid}}/verificatie/bankgegevens/{{bank_account_uid}}/7a8d3c308b0739ef96320720017d070533912548"
            }
        ]
    },
    ...
}
An example of this url can be found below.
3.2. Verify the bank account by redirecting the merchant to the verification_url.
You can find the verification_url in two places: the bank_account object, and the merchant compliance.requirements.
3.2.1. Bank account object
Find the verification_url and redirect the merchant to this link to verify the bank account.
{
    "uid": "{{bank_account_uid}}",
    "object": "bank_account",
    "created": 1554200096,
    "updated": 1554200096,
    "verified": null
     "verification_url": "https://onlinebetaalplatform.nl/nl/{{partner_name}}/merchants/{{merchant_uid}}/verificatie/bankgegevens/{{bank_account_uid}}/7a8d3c308b0739ef96320720017d070533912548",
    "status": "new",
    ...
}
3.2.2. Merchant compliance requirements
Find the requirement with type bank_account.verification.required and redirect the merchant to the object_redirect_url.
{
    "uid": "{{merchant_uid}}",
    "object": "merchant",
    ...
    "compliance": {
        "level": 200,
        "status": "unverified",
        "overview_url": "https://sandbox.onlinebetaalplatform.nl/en/{{partner_slug}}/{{merchant_uid}}/15c0bdb17283475ec5f274cad0a2a0245dda11ff/overview",
        "requirements": [
            {
                type": "bank_account.verification.required",
                "status": "unverified",
                "object_type": "bank_account",
                "object_uid": "{{bank_account_uid}}",
                "object_url": "https://api-sandbox.onlinebetaalplatform.nl/v1/merchants/{{merchant_uid}}/bank_accounts/{{bank_account_uid}}",
                "object_redirect_url": "https://sandbox.onlinebetaalplatform.nl/nl/{{partner_name}}/merchants/{{merchant_uid}}/verificatie/bankgegevens/{{bank_account_uid}}/7a8d3c308b0739ef96320720017d070533912548"
            }
        ]
    },
    ...
}
An example of this url can be found below.
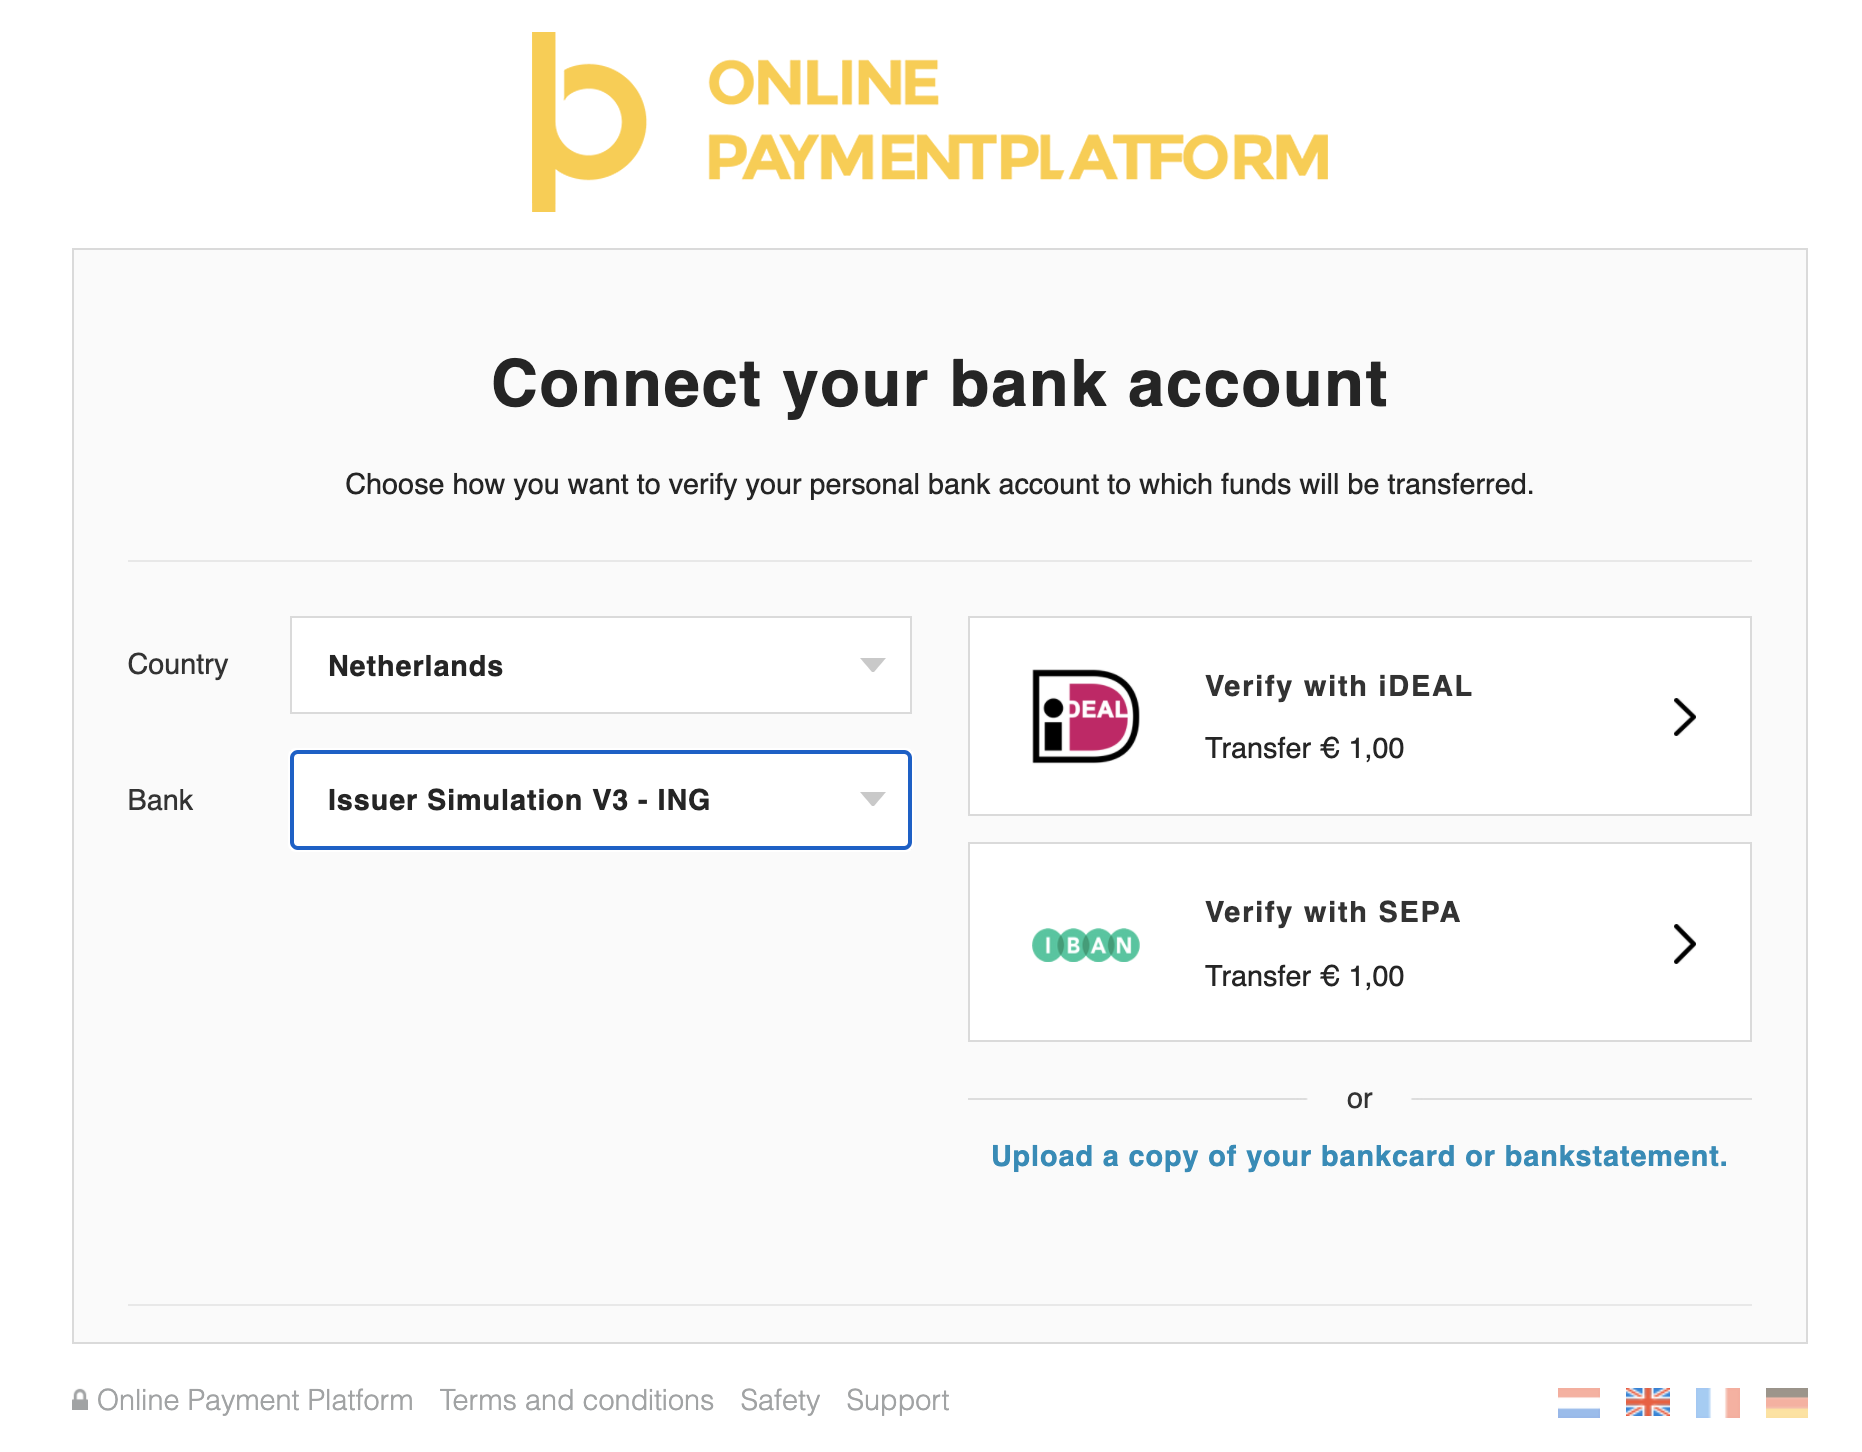
3.3. Verify bank seamlessly by redirecting merchant directly to bank / payment method.
In case of Belgium and The Netherlands, we provide a direct link with Bancontact and iDEAL, providing a seamless integration, so that merchants do not see our bank verification screen.
To do this, first find the verification_url by using one of the methods in 3.2.
After that, append additional parameters to the url. Then redirect the user to the new url.
| Additional parameters | |
| payment_method | one of ideal or bcmc |
| issuer | required if payment_method is ideal, one of the SWIFT codes of the iDEAL issuers list. |
https://onlinebetaalplatform.nl/nl/{{partner}}/merchants/{{merchant_uid}}/
    verificatie/bankgegevens/
    {{bank_account_uid}}/{{hash}}?payment_method=ideal&issuer=INGBNL2A
3.4. Verify using the Files API.
If you wish to create a seamless and smoother user experience while making sure the merchants upload their files without you having to process any sensitive data, then you can rely on the Files API to send us all documents necessary to do the KYC. This consists out of two steps.
3.4.1. Create a one time File Link
You first need to send a POST request to the Files upload endpoint and specify in the parameters the purpose of the file, ‘bank_account_bank_statement’ and provide the UID for which the upload is to be used.
POST https://files-sandbox.onlinebetaalplatform.nl/v1/uploads
{
     "purpose": "bank_account_bank_statement",
     "merchant_uid": "{{merchant_uid}}",
     "object_uid": "{{bank_account_uid}}"
}
That leads to the following response:
{
     "uid": "{{file_uid}}",
     "created": "1606003200",
     "updated": "1606003200",
     "expired": "1606004100",
     "merchant_uid": "{{merchant_uid}}",
     "object_uid": "{{bank_account_uid}}",
     "purpose": "bank_account_bank_statement",
     "token": "{{token}}",
     "url": "https://files-sandbox.onlinebetaalplatform.nl/v1/uploads/{{file_uid}}"
}
3.4.2. Upload the file
In order to finish the operation, you need to send the file via a POST request to the endpoint https://api-sandbox.onlinebetaalplatform.nl/v1/{{file_uid}}.
In the headers of this request, you need to provide the token you previously stored in the field x-opp-files-token and the file in a FILE parameter.
POST https://files-sandbox.onlinebetaalplatform.nl/v1/uploads/{{file_uid}}

Headers
{
    "x-opp-files-token": "{{token}"
}

Parameters
{
     "file": "{{file}}"
}
3.5. Verify the bank account by performing a transaction.
OPP also supports the ability to verify a merchant's bank account when the merchant itself completes a transaction to another merchant.
This can for example be used to perform buyer onboarding, when the buyer will be a seller at the platform as well. Another case is when you as a platform want to have a dynamic onboarding fee, that differs per merchant. In that case, the {{seller_merchant_uid}} will be your platform merchant.
If the merchant does not yet exist, create a merchant and an 'empty' bank account for this merchant first. This allows you to set the right notify_url and other details. Do note that you do not have to redirect merchant to the bank_account verification_url. You may pass this new merchant's uid as a parameter to the Create Transaction API call using parameter verification_merchant_uid to verify the bank account via this transaction.
POST https://api-sandbox.onlinebetaalplatform.nl/v1/transactions
{
    "merchant_uid": "{{seller_merchant_uid}}",
    "products": [
        {
            "name": "Test",
            "price": 100,
            "quantity": 1
        }
    ],
    "return_url": "https://platform.example.com/return/",
    "notify_url": "https://platform.example.com/notify/",
    "total_price": 100,
    "verification_merchant_uid": "{{buyer_merchant_uid}}",
    "metadata":
      {
        "external_id": "2015486"
      }
}
The bank account will stay in a new state if this transaction is not successfully completed and will change to state pending if transaction is successfully completed, just like the regular bank account verification flow.
Process of the approval OR disapproval
The compliance team of OPP checks all new or updated verifications within 24 hours on working days and will either approve or disapprove the verification. Notifications are sent as soon as OPP has approved or disapproved the bank account.
{
  "uid": "{{notification_uid}}",
  "type": "merchant.compliance_status.changed",
  "created": 1619182391,
  "object_uid": "{{merchant_uid}}",
  "object_type": "merchant",
  "object_url": "https://api-sandbox.onlinebetaalplatform.nl/v1/merchants/{{merchant_uid}}",
  "verification_hash": "{{hash}}"
}
{
  "uid": "{{notification_uid}}",
  "type": "bank_account.status.changed",
  "created": 1619182670,
  "object_uid": "{{bank_account_uid}}",
  "object_type": "bank_account",
  "object_url": "https://api-sandbox.onlinebetaalplatform.nl/v1/merchants/{{merchant_uid}}/bank_accounts/{{bank_account_uid}}",
  "parent_uid": "{{merchant_uid}}",
  "parent_type": "merchant",
  "parent_url": "https://api-sandbox.onlinebetaalplatform.nl/v1/merchants/{{merchant_uid}}",
  "verification_hash": "{{hash}}"
}
Approved:
The bank account information has been approved and has received the status approved. The compliance requirement
bank_account.verification.required has received the status verified and will no longer be visible within the merchant.compliance.requirements.
| Sent notifications | |
|
merchant.compliance_requirement.
status pending > verified
bank_account.status.
status pending > approved
|
|
If the merchant has no other unverified or pending compliance.requirements, then merchant's
compliance.status shall be updated from pending to verified. This change in status will also be sent by the
following notification merchant.compliance_status.changed.
- OR -
Disapproved:
The bank account information has been disapproved and has received the status disapproved. The compliance requirement bank_account.verification.required has received the status unverified.
Merchant is required to verify its bank details again, see step 3.1.
| Sent notifications | |
|
merchant.compliance_requirement.
status pending > unverified
bank_account.status.
status pending > disapproved
|
|
If the merchant's compliance.status was pending, this will be changed to unverified. This change in status will also be sent
by the following notification merchant.compliance_status.changed.
Actions
Retrieve the new status after the notification was sent, and adjust this status in your database.
4. Verify consumer identity
As a partner, you are free to decide at what moment in time you would like your merchants to complete their identity verification. We distinguish two different paths to do this:
- The merchant has not yet reached compliance level 400.
- The merchant has reached compliance level 400.
In both cases, identification provided must contain the same name as the bank account holder name.
4.1. The merchant has not yet reached compliance level 400.
As long as the merchant has not yet reached a compliance level of 400, the identity verification is not obliged by OPP.
In case you would want to already fulfill the contact verification, you can do so by using the verification_url in the merchant.contact object.
GET https://api-sandbox.onlinebetaalplatform.nl/v1/merchants/{{merchant_uid}}?expand[]=contacts
{
    "livemode": false,
    "uid": "{{merchant_uid}}",
    "object": "merchant",
    ...
    "contacts": [
        {
            "uid": "con_59c4c3b3493d",
            "object": "contact",
            "created": 1604404358,
            "updated": 1604404358,
            "verified": null,
            "status": "unverified",
            "verification_url": "https://sandbox.onlinebetaalplatform.nl/en/{{partner_slug}}/merchants/{{merchant_uid}}/verifications/contact-details/{{contact_uid}}/273db5ea58b3ce0fb061608054f32efd258b954d",
            "type": "representative",
            "title": null,
            "name_initials": null,
            "name_first": null,
            "name_last": null,
            "names_given": null,
            "birthdate": null,
            "partner_name_last": null,
            "emailaddresses": [],
            "phonenumbers": []
        }
    ],
    ...
}
After verification, the merchant will be updated, and the platform will receive the notifications that go with these updates. The compliance level will raise to 400 only when the ID verification gets verified. When you upload the ID card, and the contact status is pending, the compliance level will remain 200. Also when we disapprove the ID verification, the compliance level will remain 200.
An example of the verification url can be found below.
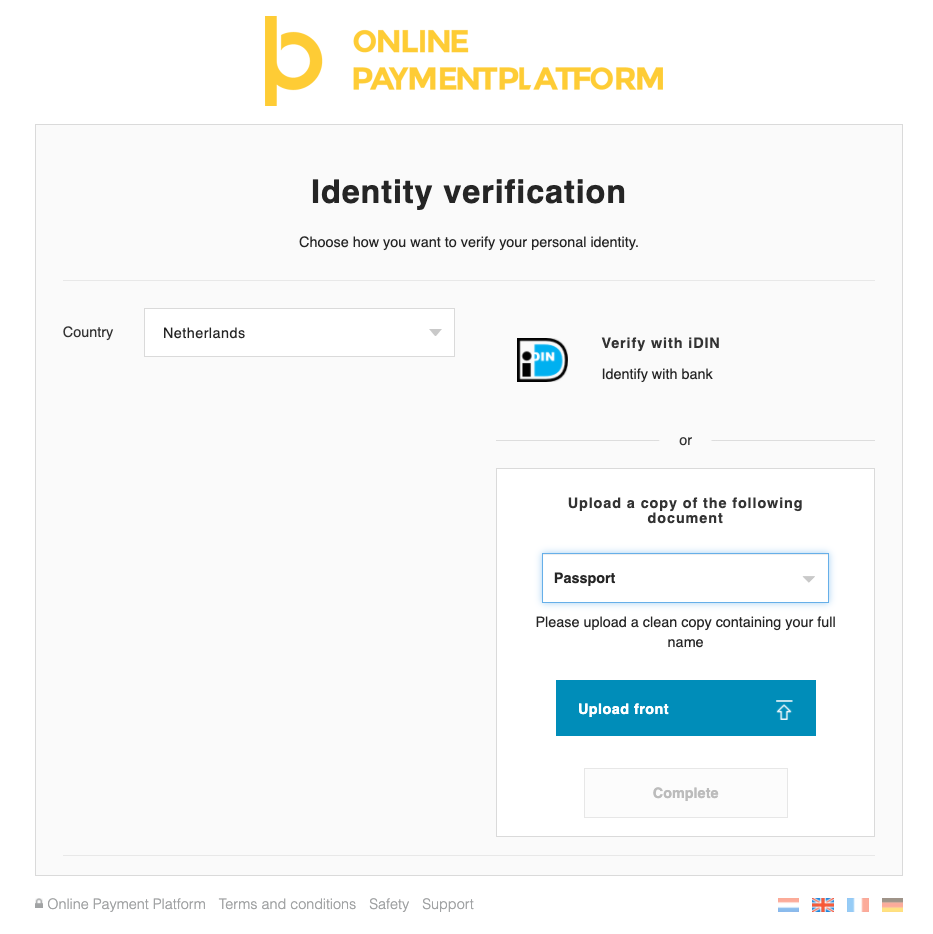
4.2. The merchant has reached compliance level 400.
Once the compliance.level of the merchant has reached 400, identity verification is required. There are four ways to provide OPP this identity. You can
- Use the
verification_urlas used in 4.1. - Use the compliance overview_url.
- Redirect the merchant to the white-label
object_redirect_url. - Verify the identification seamlessly by redirecting directly to a local identification method (such as iDIN or itsme).
- Verify using the Files API.
4.2.2. Redirect merchant to compliance overview_url.
You can find the overview_url in the merchant compliance object. Find the overview_url in the compliance object within the merchant and redirect the user to this url.
{
    "uid": "{{merchant_uid}}",
    "object": "merchant",
    ...
    "compliance": {
        "level": 200,
        "status": "unverified",
        "overview_url": "https://sandbox.onlinebetaalplatform.nl/en/{{partner_slug}}/{{merchant_uid}}/15c0bdb17283475ec5f274cad0a2a0245dda11ff/overview",
        "requirements": [
            ...
        ]
    },
    ...
}
OPP will send a notification immediately after the identification took place. The compliance.requirement contact.verification.required and the contact status will be pending until OPP performed a compliance check.
An example of this url can be found below.
4.2.3. Redirect merchant to white-label object_redirect_url.
Within the Merchant Object you will find the compliance requirement contact.verification.required.
Find the object_redirect_url and redirect the merchant to this url to identify him/herself.
Note that this is the same url as the verification_url of 4.1.
{
    "uid": "{merchant_uid}",
    "object": "merchant",
    ...
    "compliance": {
        "level": 400,
        "status": "unverified",
        "overview_url": "https://sandbox.onlinebetaalplatform.nl/en/{{partner_slug}}/{{merchant_uid}}/e1e477f8c7e6e688c8c752e5e7a4bad448f52a67/overview"
        "requirements": [
        {
    "type": "contact.verification.required",
    "status": "unverified",
    "object_uid": {{contact_uid}},
    "object_type": "contact",
    "object_url": "https://api-sandbox.onlinebetaalplatform.nl/v1/merchants/...",
    "object_redirect_url": https://sandbox.onlinebetaalplatform.nl/...
}
        ]
    },
    ...
}
OPP will send a notification immediately after the identification took place. The compliance.requirement contact.verification.required and the contact status will be pending until OPP performed a compliance check.
4.2.4. Seamlessly identify merchant by redirecting directly to a local idenfication method.
You can skip the whitelabel screens and immediately redirect the user to a local identification method if this is available in your country. Doing this requires three steps:
- Find the
object_redirect_urlorverification_urlas mentioned earlier. - Add the additional parameters as described below to the url.
- Redirect the merchant to the adapted url.
| Additional parameters | |
| verification_type | One of idin or itsme |
| issuer | required if verification_type is idin, one of the SWIFT codes of the
iDIN issuers list. |
https://onlinebetaalplatform.nl/nl/{{partner}}/merchants/{{merchant_uid}}/
    verificatie/contactgegevens
    /{{contact_uid}}/{{hash}}?verification_type=idin&issuer=INGBNL2A
4.2.5. Verify using the Files API.
If you wish to create a seamless and smoother user experience while making sure the merchants upload their files without you having to process any sensitive data, then you can rely on the Files API to send us all documents necessary to do the KYC. This consists out of two steps.
4.2.5.1. Create a one time File Link
You first need to send a POST request to the Files upload endpoint and specify in the parameters the purpose of the file, ‘representative_passport’ and provide the UID for which the upload is to be used.
POST https://files-sandbox.onlinebetaalplatform.nl/v1/uploads
{
     "purpose": "representative_passport",
     "merchant_uid": "{{merchant_uid}}",
     "object_uid": "{{contact_uid}}"
}
That leads to the following response:
{
     "uid": "{{file_uid}}",
     "created": "1606003200",
     "updated": "1606003200",
     "expired": "1606004100",
     "merchant_uid": "{{merchant_uid}}",
     "object_uid": "{{contact_uid}}",
     "purpose": "representative_passport",
     "token": "{{token}}",
     "url": "https://files-sandbox.onlinebetaalplatform.nl/v1/uploads/{{file_uid}}"
}
4.2.5.2. Upload the file
In order to finish the operation, you need to send the file via a POST request to the endpoint https://api-sandbox.onlinebetaalplatform.nl/v1/{{file_uid}}.
In the headers of this request, you need to provide the token you previously stored in the field x-opp-files-token and the file in a FILE parameter.
POST https://files-sandbox.onlinebetaalplatform.nl/v1/uploads/{{file_uid}}

Headers
{
    "x-opp-files-token": "{{token}"
}

Parameters
{
     "file": "{{file}}"
}
OPP will send a notification immediately after the identification took place. The compliance.requirement contact.verification.required
and the contact status will be pending until OPP performed a compliance check.
Process of the approval OR disapproval
The compliance team of OPP checks all new or updated verifications within 24 hours on working days and will either approve or disapprove the verification. Notifications are sent as soon as OPP has approved or disapproved the identification.
Approved:
The identification has been approved and has received the status verified. The compliance requirement contact.verification.required
has been updated with the status verified and is no longer visible within the merchant.compliance.requirements.
| Sent notifications | |
|
merchant.compliance_requirement.
status pending > verified
contact.status.
status pending > verified
|
|
If the merchant has no other unverified or pending compliance.requirements, merchant's
compliance.status will be updated from pending to verified. This change in status will
also be sent by the following notification merchant.compliance_status.changed.
- OR -
Disapproved:
The identification has been disapproved and has received the status unverified. The compliance requirement contact.verification.required
has been updated with the status unverified. The merchant is required to identify itself again, see step 1.
| Sent notifications | |
|
merchant.compliance_requirement.
status pending > unverified
contact.status.
status pending > unverified
|
|
If the merchant's compliance.status was pending, this will be updated to unverified. This change in status will also be sent by the
following notification merchant.compliance_status.changed.
5. Fulfill other requirements
A business merchant might have several other compliance requirements to fulfill:
- Contact phone verification.
5.1. Contact phone verification
Once the merchant is created, you will find the contact.phonenumber.required requirement. OPP needs to have a phonenumber that belongs to the merchant. We are legally bound to have a verified phonenumber and email address from every merchant, in order to contact him/her when something is wrong with a transaction or verification.
You as a partner have to deal with the verification of an email address before creating the merchant.
For phone number verification, OPP provides the choice to do it yourself, or let us do the phonenumber verification.
    "uid": "{{merchant_uid}}",
    "object": "merchant",
    ...
    "compliance": {
        "level": 100,
        "status": "unverified",
        "overview_url": "https://sandbox.onlinebetaalplatform.nl/en/{{partner_slug}}/{{merchant_uid}}/feabfd98b2a9d246a6e33742f92af061059b9f81/overview",
        "requirements": [
            {
                "type": "contact.phonenumber.required",
                "status": "unverified",
                "object_type": "contact_phonenumber",
                "object_uid": null,
                "object_url": null,
                "object_redirect_url": "https://sandbox.onlinebetaalplatform.nl/en/{{partner_slug}}/merchants/{{merchant_uid}}/verifications/phonenumber-form/{{contact_uid}}/feabfd98b2a9d246a6e33742f92af061059b9f81"
            }]
        ...
If you prefer to do verification yourself, you can choose to do this at the very beginning, before creating a merchant at our side, or when the merchant already exists. In the compliance requirements, find the object_redirect_url and redirect the representative of the business to this url. If you would prefer a seamless solution, you can do this by performing a POST on the contact object as can be seen on the right. Once the phonenumber is filled in, the merchant will be updated and the notifications will be send.
POST https://api-sandbox.onlinebetaalplatform.nl/v1/merchants/{{merchant_uid}}/contacts/{{contact_uid}} \
{
    "phonenumbers": [
            {
                "phonenumber": "0612345678"
            }
        ]
}
In case you want OPP to do the verification, you will find a object_redirect_url in the contact.phonenumber.verification.required compliance requirement. Redirect the user to this url, where (s)he can fill in the phonenumber to be verified.
A text message will be send to the phonenumber, which needs to be filled in to verify the phonenumber.
The requirement will then disappear.
Business onboarding
As a partner you can create a business merchant using the 5 steps described below. A business merchant must always complete the High KYC.
As soon as a merchant is created, you can start doing transactions. As a partner, you are in charge of when the merchant fulfills the verification requirements. In many cases the partner wants the merchant to perform the least number of actions as possible in the beginning, but in some cases the partner may wish to force the business to perform all KYC steps before transactions can be started. Both options are possible, and completely up to you.
The five steps of business merchant creation are:
- Create a business merchant.
- Create a
bank_account. - Verify business bank account.
- Business representative verification.
- Fulfill other requirements (not required in all cases).
1. Create a business merchant
1.1 Example request
With the example request shown below you can create a business merchant. As a partner you will receive the Merchant Object with compliance.level 400 as a response.
POST https://api-sandbox.onlinebetaalplatform.nl/v1/merchants
{
  "type": "business",
  "coc_nr": "12345678",
  "country": "nld",
  "emailaddress": "email@domain.com",
  "phone": "0612345678",
  "notify_url": "https://platform.com/notify"
}
The minimal required fields are: coc_nr, type, country, emailaddress, phone and notify_url.
The emailaddress is our unique identifier. You cannot create multiple merchants with the same email address.
Please note that the phonenumber is not required by the API. You are free to leave this out when creating the merchant, but the merchant will need to provide the phonenumber in a later stage. See 5. Fulfill other requirements.
The notify_url is the webhook URL used by OPP for notifications of status changes.
1.2. Example response
{
    "uid": "{{merchant_uid}}",
    "object": "merchant",
    "created": 1604661043,
    "updated": 1604661043,
    "status": "pending",
    "compliance": {
        "level": 400,
        "status": "unverified",
        "overview_url": "https://sandbox.onlinebetaalplatform.nl/en/{{partner_slug}}/{{merchant_uid}}/{{hash}}/overview",
        "requirements": [
            {
                "type": "bank_account.required",
                "status": "unverified",
                "object_type": "bank_account",
                "object_uid": null,
                "object_url": "https://api-sandbox.onlinebetaalplatform.nl/v1/merchants/{{merchant_uid}}/bank_accounts",
                "object_redirect_url": null
            },
            {
                "type": "contact.verification.required",
                "status": "unverified",
                "object_type": "contact",
                "object_uid": "{{contact_uid}}",
                "object_url": "https://api-sandbox.onlinebetaalplatform.nl/v1/merchants/{{merchant_uid}}/contacts/con_e9e5e1b7bd23",
                "object_redirect_url": "https://sandbox.onlinebetaalplatform.nl/en/{{partner_slug}}/merchants/{{merchant_uid}}/verifications/contact-details/{{contact_uid}}/{{hash}}"
            }
        ]
    },
    "type": "business",
    "coc_nr": "12345678",
    ...
}
Within the Merchant Object you will also find the Merchant UID, this is the unique identifier of the created merchant and as a partner you will need to save the Merchant UID and use it to, amongst other things, create transactions for this merchant. It is therefore required to store the Merchant UID within your own application.
1.3. Actions
The merchant object contains three fields that you will need to save in your database:
merchant_uid- The Merchant UID, this is the unique identifier of the created merchant.status- The merchant account status.compliance.status- The compliance status of the merchant. This status will define whether the merchant will be able to receive payouts.
Ofcourse, other values can be saved in your database as well, if that is preferred by you. These three values are important for the flows in your platform.
After the creation of the merchant, it is immediately possible as a partner to create transactions for this merchant. The funds of the paid transactions cannot (yet) be paid out because the merchant still has outstanding compliance requirements.
1.3. Received notifications
Initializing a merchant will trigger some initial notifications from out the system.
| Sent notifications | |
|
merchant.compliance_requirement.status.
status pending/verified > unverified
merchant.compliance_status.
status pending/verified > unverified
|
|
There is no necessaty to follow up these notifications, but it does allow you to send an initial email towards the merchant about their outstanding compliance requirements.
2. Create a bank account - Business
2.1 Example request
POST https://api-sandbox.onlinebetaalplatform.nl/v1/merchants/{{merchant_uid}}/bank_accounts
{
    "return_url": "https://platform.example.com/return",
    "notify_url": "https://platform.example.com/notify"
}
With this request you can create an 'empty' bank account for the merchant.
This 'empty' bank account serves as a container that needs to be filled with verified bank account information.
The bank account is created with a status of new and needs to be verified by the merchant.
2.2. Example response
{
    "uid": "{{bank_account_uid}}",
    "object": "bank_account",
    "created": 1554200096,
    "updated": 1554200096,
    "verified": null
    "verification_url": "https://onlinebetaalplatform.nl/nl/
     {{partner_name}}/merchants/{{merchant_uid}}/verificatie/
     bankgegevens/{{bank_account_uid}}/7a8d3c308b0739ef96320720017d070533912548",
    "status": "new",
    "account": {
        "account_iban": null
    },
    "bank": {
        "bic": null
    },
    "reference": null,
    "return_url": "https://platform.example.com/return",
    "notify_url": "https://platform.example.com/notify",
    "is_default": true
}
Now that the required bank account has been created, you will receive a notification with type merchant.compliance_requirement.status.changed.
The compliance requirement bank_account.required is set to verified, and is being replaced by bank_account.verification.required
The verification_url that can be found in the response of the bank_account object is the same URL that is detailed in the compliance requirement.
2.3. Actions
Redirect the merchant to the verification_url.
Optionally, you can save the UID and verification_url in your database.
3. Verify business bank account
In the previous step we created an 'empty' bank account for the business merchant. To verify the bank account, we can follow four routes:
- Use the compliance overview_url.
- Use the verification_url.
- Use the seamless bank integration.
- Verify using the Files API.
- Perform a transaction (buyer onboarding).
In all cases OPP will send a notification right after the verification took place. The compliance requirement bank_account.verification.required and the bank
account status will be pending until OPP has performed a compliance check.
3.1. Verify the bank account by redirecting the merchant to the compliance overview_url
You can find the overview_url in the merchant compliance object. Find the overview_url in the compliance object within the merchant and redirect the user to this url.
{
    "uid": "{{merchant_uid}}",
    "object": "merchant",
    ...
    "compliance": {
        "level": 400,
        "status": "unverified",
        "overview_url": "https://sandbox.onlinebetaalplatform.nl/en/{{partner_slug}}/{{merchant_uid}}/15c0bdb17283475ec5f274cad0a2a0245dda11ff/overview",
        "requirements": [
            {
                "type": "bank_account.verification.required",
                "status": "unverified",
                "object_type": "bank_account",
                "object_uid": "{{bank_account_uid}}",
                "object_url": "https://api-sandbox.onlinebetaalplatform.nl/v1/merchants/{{merchant_uid}}/bank_accounts/{{bank_account_uid}}",
                "object_redirect_url": "https://sandbox.onlinebetaalplatform.nl/nl/{{partner_name}}/merchants/{{merchant_uid}}/verificatie/bankgegevens/{{bank_account_uid}}/7a8d3c308b0739ef96320720017d070533912548"
            },
            ...
        ]
    },
    ...
}
An example of this url can be found below.
3.2. Verify the bank account by redirecting the merchant to the verification_url.
You can find the verification_url in two places: the bank_account object, and the merchant compliance.requirements.
3.2.1. Bank account object
Find the verification_url and redirect the merchant to this link to verify the bank account.
{
    "uid": "{{bank_account_uid}}",
    "object": "bank_account",
    "created": 1554200096,
    "updated": 1554200096,
    "verified": null
     "verification_url": "https://onlinebetaalplatform.nl/nl/{{partner_name}}/merchants/{{merchant_uid}}/verificatie/bankgegevens/{{bank_account_uid}}/7a8d3c308b0739ef96320720017d070533912548",
    "status": "new",
    ...
}
3.2.2. Merchant compliance requirements
Find the requirement with type bank_account.verification.required and redirect the merchant to the object_redirect_url.
{
    "uid": "{{merchant_uid}}",
    "object": "merchant",
    ...
    "compliance": {
        "level": 200,
        "status": "unverified",
        "overview_url": "https://sandbox.onlinebetaalplatform.nl/en/{{partner_slug}}/{{merchant_uid}}/15c0bdb17283475ec5f274cad0a2a0245dda11ff/overview",
        "requirements": [
            {
                type": "bank_account.verification.required",
                "status": "unverified",
                "object_type": "bank_account",
                "object_uid": "{{bank_account_uid}}",
                "object_url": "https://api-sandbox.onlinebetaalplatform.nl/v1/merchants/{{merchant_uid}}/bank_accounts/{{bank_account_uid}}",
                "object_redirect_url": "https://sandbox.onlinebetaalplatform.nl/nl/{{partner_name}}/merchants/{{merchant_uid}}/verificatie/bankgegevens/{{bank_account_uid}}/7a8d3c308b0739ef96320720017d070533912548"
            }
        ]
    },
    ...
}
An example of this url can be found below.
3.3 Verify bank seamlessly by redirecting merchant directly to bank / payment method.
In case of Belgium and The Netherlands, we provide a direct link with Bancontact and iDEAL, providing a seamless integration, so that merchants do not see our bank verification screen.
To do this, first find the verification_url by using on of the methods in 3.1.
After that, append additional parameters to the url. Then redirect the user to the new url.
| Additional parameters | |
| payment_method | one of ideal or bcmc |
| issuer | required if payment_method is ideal, one of the SWIFT codes of the iDEAL issuers list. |
https://onlinebetaalplatform.nl/nl/{{partner}}/merchants/{{merchant_uid}}/
    verificatie/bankgegevens/
    {{bank_account_uid}}/{{hash}}?payment_method=ideal&issuer=INGBNL2A
3.4. Verify using the Files API.
If you wish to create a seamless and smoother user experience while making sure the merchants upload their files without you having to process any sensitive data, then you can rely on the Files API to send us all documents necessary to do the KYC. This consists out of two steps.
3.4.1. Create a one time File Link
You first need to send a POST request to the Files upload endpoint and specify in the parameters the purpose of the file, ‘bank_account_bank_statement’ and provide the UID for which the upload is to be used.
POST https://files-sandbox.onlinebetaalplatform.nl/v1/uploads
{
     "purpose": "bank_account_bank_statement",
     "merchant_uid": "{{merchant_uid}}",
     "object_uid": "{{bank_account_uid}}"
}
That leads to the following response:
{
     "uid": "{{file_uid}}",
     "created": "1606003200",
     "updated": "1606003200",
     "expired": "1606004100",
     "merchant_uid": "{{merchant_uid}}",
     "object_uid": "{{bank_account_uid}}",
     "purpose": "bank_account_bank_statement",
     "token": "{{token}}",
     "url": "https://files-sandbox.onlinebetaalplatform.nl/v1/uploads/{{file_uid}}"
}
3.4.2. Upload the file
In order to finish the operation, you need to send the file via a POST request to the endpoint https://api-sandbox.onlinebetaalplatform.nl/v1/{{file_uid}}.
In the headers of this request, you need to provide the token you previously stored in the field x-opp-files-token and the file in a FILE parameter.
POST https://files-sandbox.onlinebetaalplatform.nl/v1/uploads/{{file_uid}}

Headers
{
    "x-opp-files-token": "{{token}"
}

Parameters
{
     "file": "{{file}}"
}
3.5. Verify the bank account by performing a transaction.
OPP also supports the ability to verify a merchant's bank account when the merchant itself completes a transaction to another merchant.
This can for example be used to perform buyer onboarding, when the buyer will be a seller at the platform as well. Another case is when you as a platform want to have a dynamic onboarding fee, that differs per merchant. In that case, the {{seller_merchant_uid}} will be your platform merchant.
If the merchant does not yet exist, create a merchant and an 'empty' bank account for this merchant first. This allows you to set the right notify_url and other details. Do note that you do not have to redirect merchant to the bank_account verification_url. You may pass this new merchant's uid as a parameter to the Create Transaction API call using parameter verification_merchant_uid to verify the bank account via this transaction.
POST https://api-sandbox.onlinebetaalplatform.nl/v1/transactions
{
    "merchant_uid": "{{seller_merchant_uid}}",
    "products": [
        {
            "name": "Test",
            "price": 100,
            "quantity": 1
        }
    ],
    "return_url": "https://platform.example.com/return/",
    "notify_url": "https://platform.example.com/notify/",
    "total_price": 100,
    "verification_merchant_uid": "{{buyer_merchant_uid}}",
    "metadata":
      {
        "external_id": "2015486"
      }
}
The bank account will stay in a new state if this transaction is not successfully completed and will change to state pending if transaction is successfully completed, just like the regular bank account verification flow.
Process of the approval OR disapproval
The compliance team of OPP checks all new or updated verifications within 24 hours on working days and will either approve or disapprove the verification. Notifications are sent as soon as OPP has approved or disapproved the bank account.
Approved:
The bank account information has been approved and has received the status approved. The compliance requirement
bank_account.verification.required has received the status verified and will no longer be visible within the merchant.compliance.requirements.
| Sent notifications | |
|
merchant.compliance_requirement.
status pending > verified
bank_account.status.
status pending > approved
|
|
If the merchant has no other unverified or pending compliance.requirements, then merchant's
compliance.status shall be updated from pending to verified. This change in status will also be sent by the
following notification merchant.compliance_status.changed.
- OR -
Disapproved:
The bank account information has been disapproved and has received the status disapproved. The compliance requirement bank_account.verification.required has received the status unverified.
Merchant is required to verify its bank details again, see step 3.1.
| Sent notifications | |
|
merchant.compliance_requirement.
status pending > unverified
bank_account.status.
status pending > disapproved
|
|
If the merchant's compliance.status was pending, this will be changed to unverified. This change in status will also be sent
by the following notification merchant.compliance_status.changed.
4. Business representative verification
Within the Merchant Object you will find the compliance requirement contact.verification.required. The representative of the business is required to identify him or herself.
There are three ways to provide OPP this identity. You can
- Use the
verification_url. - Use the compliance overview_url.
- Redirect the merchant to the white-label
object_redirect_url. - Verify the identification seamlessly by redirecting directly to a local identification method (such as iDIN or itsme).
- Verify using the Files API.
4.1. Use the whitelabel verification url.
In case you would want to fulfill the contact verification using the contact object, you can do so by using the verification_url in the merchant.contact object.
GET https://api-sandbox.onlinebetaalplatform.nl/v1/merchants/{{merchant_uid}}?expand[]=contacts
{
    "livemode": false,
    "uid": "{{merchant_uid}}",
    "object": "merchant",
    ...
    "contacts": [
        {
            "uid": "con_59c4c3b3493d",
            "object": "contact",
            "created": 1604404358,
            "updated": 1604404358,
            "verified": null,
            "status": "unverified",
            "verification_url": "https://sandbox.onlinebetaalplatform.nl/en/{{partner_slug}}/merchants/{{merchant_uid}}/verifications/contact-details/{{contact_uid}}/273db5ea58b3ce0fb061608054f32efd258b954d",
            "type": "representative",
            "title": null,
            "name_initials": null,
            "name_first": null,
            "name_last": null,
            "names_given": null,
            "birthdate": null,
            "partner_name_last": null,
            "emailaddresses": [],
            "phonenumbers": []
        }
    ],
    ...
}
After verification, the merchant will be updated, and the platform will receive the notifications that go with these updates.
An example of the verification url can be found below.
4.2. Redirect merchant to compliance overview_url.
You can find the overview_url in the merchant compliance object. Find the overview_url in the compliance object within the merchant and redirect the user to this url.
{
    "uid": "{{merchant_uid}}",
    "object": "merchant",
    ...
    "compliance": {
        "level": 400,
        "status": "unverified",
        "overview_url": "https://sandbox.onlinebetaalplatform.nl/en/{{partner_slug}}/{{merchant_uid}}/15c0bdb17283475ec5f274cad0a2a0245dda11ff/overview",
        "requirements": [
            ...
        ]
    },
    ...
}
OPP will send a notification immediately after the identification took place. The compliance.requirement contact.verification.required and the contact status will be pending until OPP performed a compliance check.
An example of this url can be found below.
4.3. Redirect merchant to white-label object_redirect_url.
Within the Merchant Object you will find the compliance requirement contact.verification.required.
Find the object_redirect_url and redirect the merchant to this url to identify him/herself.
Note that this is the same url as the verification_url of 4.1.
{
    "uid": "{merchant_uid}",
    "object": "merchant",
    ...
    "compliance": {
        "level": 400,
        "status": "unverified",
        "overview_url": "https://sandbox.onlinebetaalplatform.nl/en/{{partner_slug}}/{{merchant_uid}}/e1e477f8c7e6e688c8c752e5e7a4bad448f52a67/overview"
        "requirements": [
        {
    "type": "contact.verification.required",
    "status": "unverified",
    "object_uid": {{contact_uid}},
    "object_type": "contact",
    "object_url": "https://api-sandbox.onlinebetaalplatform.nl/v1/merchants/...",
    "object_redirect_url": https://sandbox.onlinebetaalplatform.nl/...
}
        ]
    },
    ...
}
OPP will send a notification immediately after the identification took place. The compliance.requirement contact.verification.required and the contact status will be pending until OPP performed a compliance check.
4.4. Seamlessly identify merchant by redirecting directly to a local idenfication method.
You can skip the whitelabel screens and immediately redirect the user to a local identification method if this is available in your country. Doing this requires three steps:
- Find the
object_redirect_urlorverification_urlas mentioned earlier. - Add the additional parameters as described below to the url.
- Redirect the merchant to the adapted url.
| Additional parameters | |
| verification_type | One of idin or itsme |
| issuer | required if verification_type is idin, one of the SWIFT codes of the
iDIN issuers list. |
https://onlinebetaalplatform.nl/nl/{{partner}}/merchants/{{merchant_uid}}/
    verificatie/contactgegevens
    /{{contact_uid}}/{{hash}}?verification_type=idin&issuer=INGBNL2A
4.2.5. Verify using the Files API.
If you wish to create a seamless and smoother user experience while making sure the merchants upload their files without you having to process any sensitive data, then you can rely on the Files API to send us all documents necessary to do the KYC. This consists out of two steps.
4.2.5.1. Create a one time File Link
You first need to send a POST request to the Files upload endpoint and specify in the parameters the purpose of the file, ‘representative_passport’ and provide the UID for which the upload is to be used.
POST https://files-sandbox.onlinebetaalplatform.nl/v1/uploads
{
     "purpose": "representative_passport",
     "merchant_uid": "{{merchant_uid}}",
     "object_uid": "{{contact_uid}}"
}
That leads to the following response:
{
     "uid": "{{file_uid}}",
     "created": "1606003200",
     "updated": "1606003200",
     "expired": "1606004100",
     "merchant_uid": "{{merchant_uid}}",
     "object_uid": "{{contact_uid}}",
     "purpose": "representative_passport",
     "token": "{{token}}",
     "url": "https://files-sandbox.onlinebetaalplatform.nl/v1/uploads/{{file_uid}}"
}
4.2.5.2. Upload the file
In order to finish the operation, you need to send the file via a POST request to the endpoint https://api-sandbox.onlinebetaalplatform.nl/v1/{{file_uid}}.
In the headers of this request, you need to provide the token you previously stored in the field x-opp-files-token and the file in a FILE parameter.
POST https://files-sandbox.onlinebetaalplatform.nl/v1/uploads/{{file_uid}}

Headers
{
    "x-opp-files-token": "{{token}"
}

Parameters
{
     "file": "{{file}}"
}
OPP will send a notification immediately after the identification took place. The compliance.requirement contact.verification.required
and the contact status will be pending until OPP performed a compliance check.
Process of the approval OR disapproval
The compliance team of OPP checks all new or updated verifications within 24 hours on working days and will either approve or disapprove the verification. Notifications are sent as soon as OPP has approved or disapproved the identification.
Approved:
The identification has been approved and has received the status verified. The compliance requirement contact.verification.required
has been updated with the status verified and is no longer visible within the merchant.compliance.requirements.
| Sent notifications | |
|
merchant.compliance_requirement.
status pending > verified
contact.status.
status pending > verified
|
|
If the merchant has no other unverified or pending compliance.requirements, merchant's
compliance.status will be updated from pending to verified. This change in status will
also be sent by the following notification merchant.compliance_status.changed.
- OR -
Disapproved:
The identification has been disapproved and has received the status unverified. The compliance requirement contact.verification.required
has been updated with the status unverified. The merchant is required to identify itself again, see step 1.
| Sent notifications | |
|
merchant.compliance_requirement.
status pending > unverified
contact.status.
status pending > unverified
|
|
If the merchant's compliance.status was pending, this will be updated to unverified. This change in status will also be sent by the
following notification merchant.compliance_status.changed.
5. Fulfill other requirements
A business merchant might have several other compliance requirements to fulfill:
- Contact phone verification.
- UBO verification.
- Chamber of Commerce extract.
- Organization structure.
5.1. Contact phone verification
Once the business merchant is created, you will find the contact.phonenumber.required requirement. OPP needs to have a phonenumber that belongs to the representative who verified in step 4. We are legally bound to have a verified phonenumber and email address from every merchant, in order to contact him/her when something is wrong with a transaction or verification.
You as a partner have to deal with the verification of an email address before creating the merchant.
For phone number verification, OPP provides the choice to do it yourself, or let us do the phonenumber verification.
    "uid": "{{merchant_uid}}",
    "object": "merchant",
    ...
    "compliance": {
        "level": 400,
        "status": "unverified",
        "overview_url": "https://sandbox.onlinebetaalplatform.nl/en/{{partner_slug}}/{{merchant_uid}}/feabfd98b2a9d246a6e33742f92af061059b9f81/overview",
        "requirements": [
            {
                "type": "contact.phonenumber.required",
                "status": "unverified",
                "object_type": "contact_phonenumber",
                "object_uid": null,
                "object_url": null,
                "object_redirect_url": "https://sandbox.onlinebetaalplatform.nl/en/{{partner_slug}}/merchants/{{merchant_uid}}/verifications/phonenumber-form/{{contact_uid}}/feabfd98b2a9d246a6e33742f92af061059b9f81"
            }]
        ...
If you prefer to do verification yourself, you can choose to do this at the very beginning, before creating a merchant at our side, or when the merchant already exists. In the compliance requirements, find the object_redirect_url and redirect the representative of the business to this url. If you would prefer a seamless solution, you can do this by performing a POST on the contact object as can be seen on the right. Once the phonenumber is filled in, the merchant will be updated and the notifications will be send.
POST https://api-sandbox.onlinebetaalplatform.nl/v1/merchants/{{merchant_uid}}/contacts/{{contact_uid}} \
{
    "phonenumbers": [
            {
                "phonenumber": "0612345678"
            }
        ]
}
In case you want OPP to do the verification, you will find a object_redirect_url in the contact.phonenumber.verification.required compliance requirement. Redirect the user to this url, where (s)he can fill in the phonenumber to be verified.
A text message will be send to the phonenumber, which needs to be filled in to verify the phonenumber.
The requirement will then disappear.
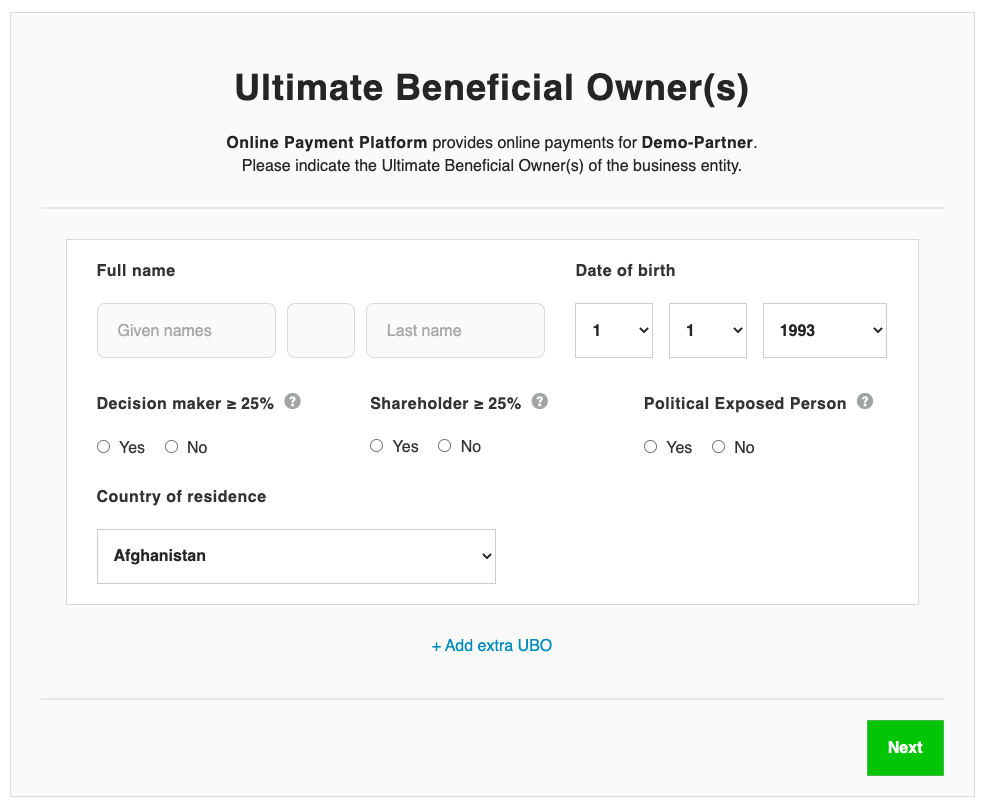
5.2. UBO verification
OPP is obliged to trace all Ultimate Beneficial Owners (UBO) of a business entity. Legal business entities such as a B.V., GmbH or BVBA may have more than one UBO. When checking the business verifications, OPP determines whether the UBO verification is required. This verification is therefore never directly required when creating the merchant.
An UBO is a natural person that has at least one of the following:
- 25% of the shares or exercising voting rights
- effective control of the company or organization
- 25% or more beneficiary rights on the capital OR
- special control of 25% or more on the capital
As a partner, you can either choose to already provide us with the UBO information, or wait for the requirement to arrive. If our compliance department finds an UBO that has not registered yet, the compliance requirement ubo.required will be triggered.
You can then choose to seamlessly provide the UBO information as described in the documentation, or redirect the merchant to the object_redirect_url to fulfill the requirement.
{
    "uid": "{{merchant_uid}}",
    "object": "merchant",
    ...
    "compliance": {
        "level": 400,
        "status": "unverified",
        "requirements": [
            {
    "type": "ubo.required",
    "status": "unverified",
    "object_uid": null,
    "object_type": "null",
    "object_url": "https://api-sandbox.onlinebetaalplatform.nl/v1/merchants/...",
    "object_redirect_url": https://sandbox.onlinebetaalplatform.nl/...
}
        ]
    },
    ...
}
An example of the redirect url can be found below:
Now that the required UBO has been created, you will receive a notification with type merchant.compliance_requirement.status.changed.
The compliance requirement ubo.required is set to verified, and is being replaced by ubo.verification.required, which has status pending as all information has just been provided.
OPP will send the following notifications when the UBO verification is required:
| Sent notifications | |
|
merchant.compliance_status.
status pending/verified > unverified
|
|
The compliance team of OPP checks all new or updated verifications within 72 hours on working days and will either approve or disapprove the verification. Notifications are sent as soon as OPP has approved or disapproved the identification.
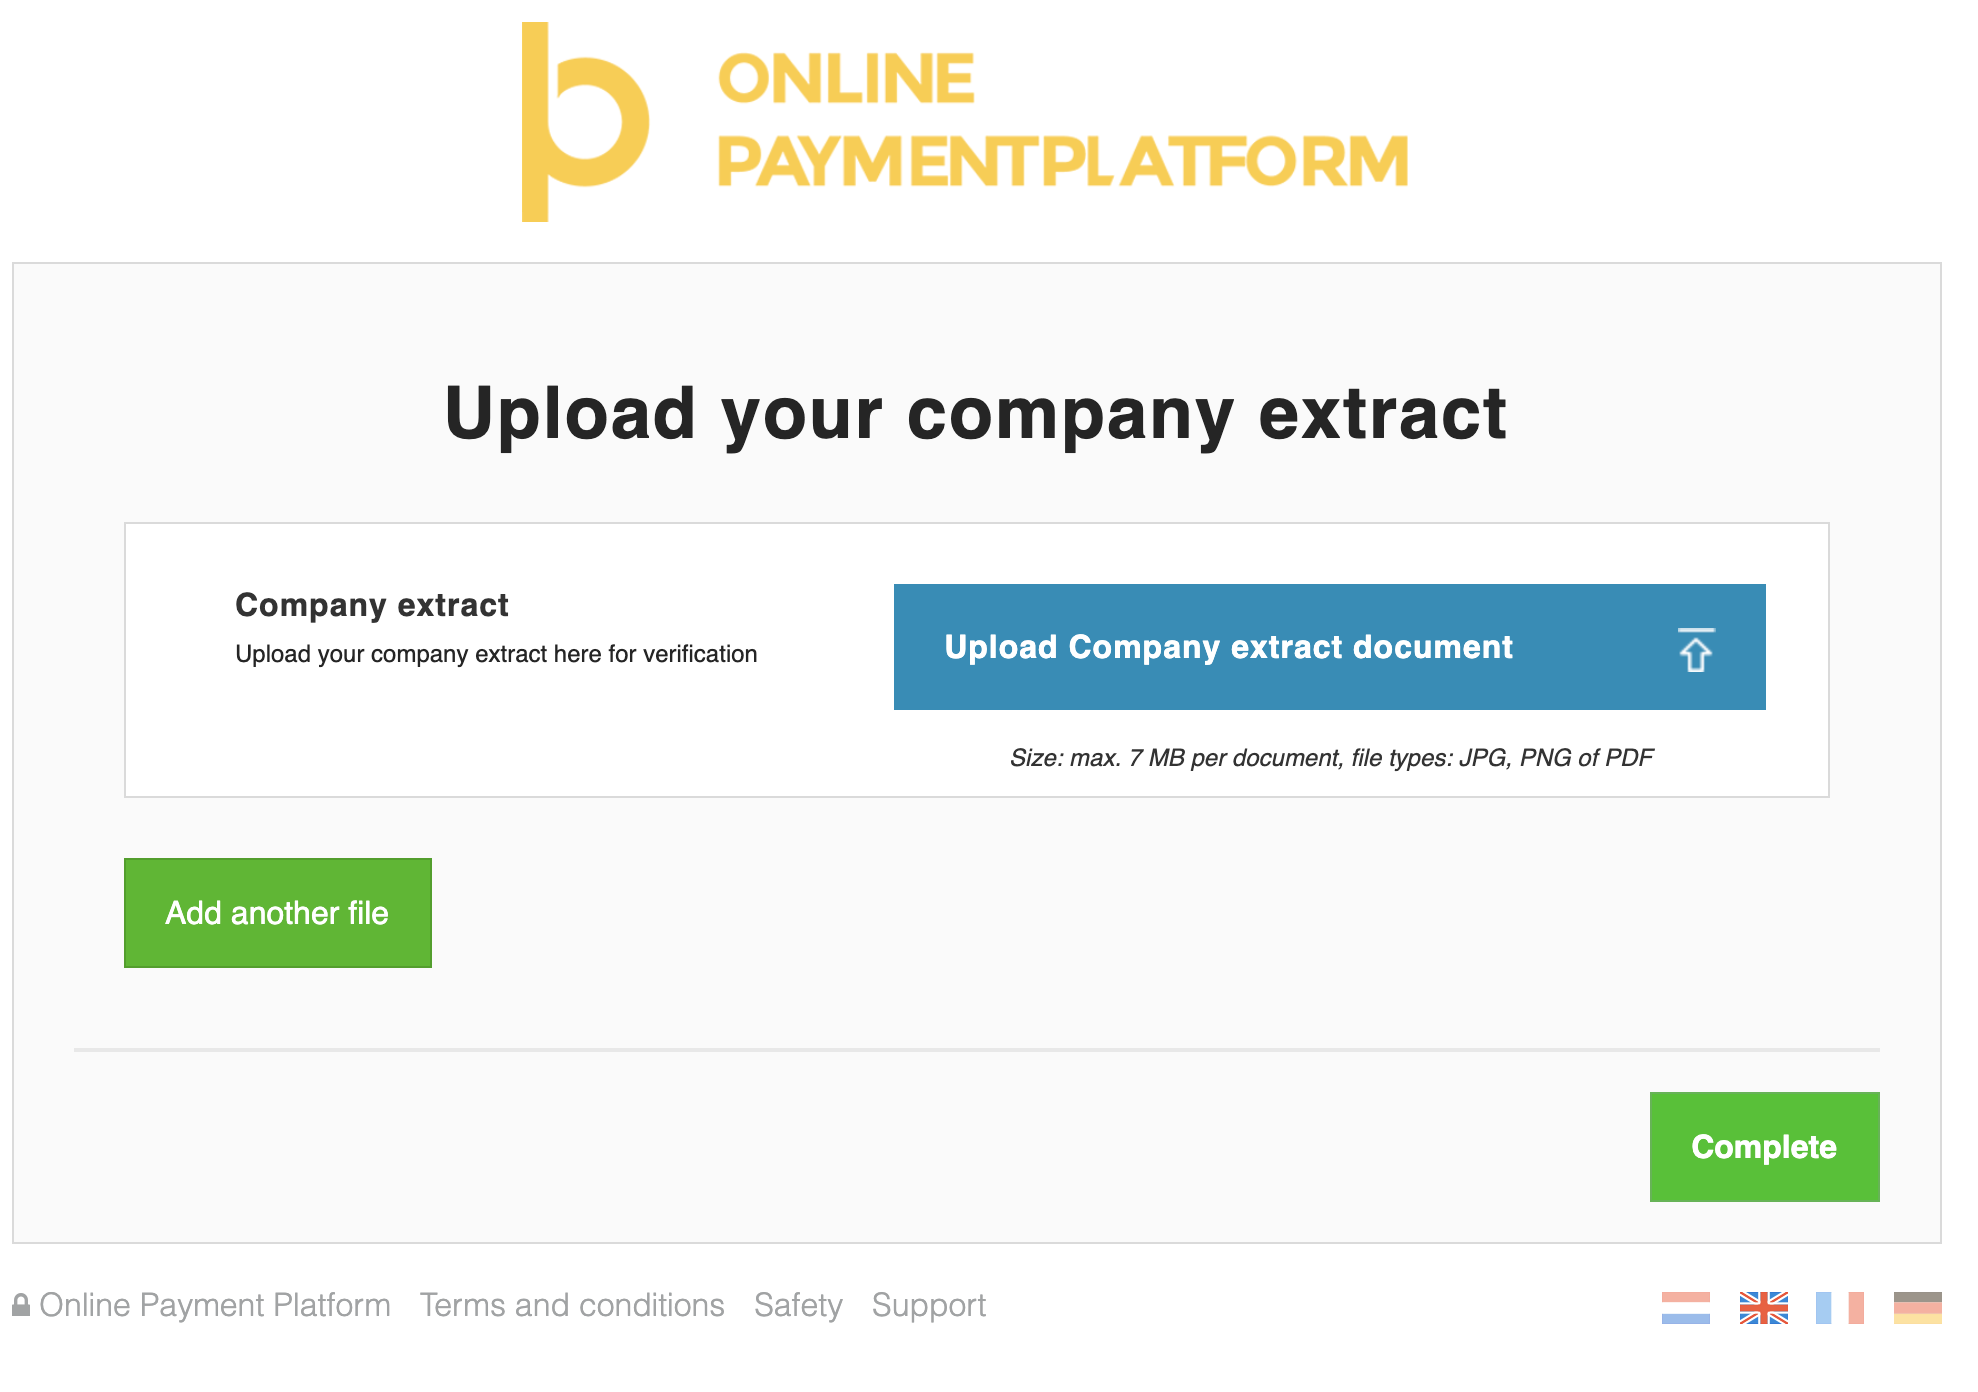
5.3. Chamber of Commerce extract
In case our compliance department is unable to retrieve the chamber of commerce extract from our registers, you might be required to deliver this to us.
In that case, you will find the coc_extract.required type of requirement in your compliance requirements.
There are three ways to fulfill this requirement:
- Use the compliance overview_url.
- Use the verification_url.
- Verify using the Files API.
Redirect the merchant to the object_redirect_url to fulfill this requirement.
{
    "uid": "{{merchant_uid}}",
    "object": "merchant",
    ...
    "compliance": {
        "level": 400,
        "status": "unverified",
        "requirements": [
            {
                "type": "coc_extract.required",
                "status": "unverified",
                "object_type": null,
                "object_uid": null,
                "object_url": null,
                "object_redirect_url": "https://sandbox.onlinebetaalplatform.nl/en/{{partner_name}}/merchants/{{merchant_uid}}/verifications/coc-extract/feabfd98b2a9d246a6e33742f92af061059b9f81"
            }
        ]
    },
    ...
}
An example of the url can be found below:
The chamber of commerce extract can also be uploaded using our Files API as follows. If you wish to create a seamless and smoother user experience while making sure the merchants upload their files without you having to process any sensitive data, then you can rely on the Files API to send us all documents necessary to do the KYC. This consists out of two steps.
5.3.3.1 Create a one time File Link
You first need to send a POST request to the Files upload endpoint and specify in the parameters the purpose of the file, ‘coc_extract’ and provide the UID for which the upload is to be used.
POST https://files-sandbox.onlinebetaalplatform.nl/v1/uploads
{
     "purpose": "coc_extract",
     "merchant_uid": "{{merchant_uid}}",
     "object_uid": "{{merchant_uid}}"
}
That leads to the following response:
{
     "uid": "{{file_uid}}",
     "created": "1606003200",
     "updated": "1606003200",
     "expired": "1606004100",
     "merchant_uid": "{{merchant_uid}}",
     "object_uid": "{{merchant_uid}}",
     "purpose": "coc_extract",
     "token": "{{token}}",
     "url": "https://files-sandbox.onlinebetaalplatform.nl/v1/uploads/{{file_uid}}"
}
5.3.3.2. Upload the file
In order to finish the operation, you need to send the file via a POST request to the endpoint https://api-sandbox.onlinebetaalplatform.nl/v1/{{file_uid}}.
In the headers of this request, you need to provide the token you previously stored in the field x-opp-files-token and the file in a FILE parameter.
POST https://files-sandbox.onlinebetaalplatform.nl/v1/uploads/{{file_uid}}

Headers
{
    "x-opp-files-token": "{{token}"
}

Parameters
{
     "file": "{{file}}"
}
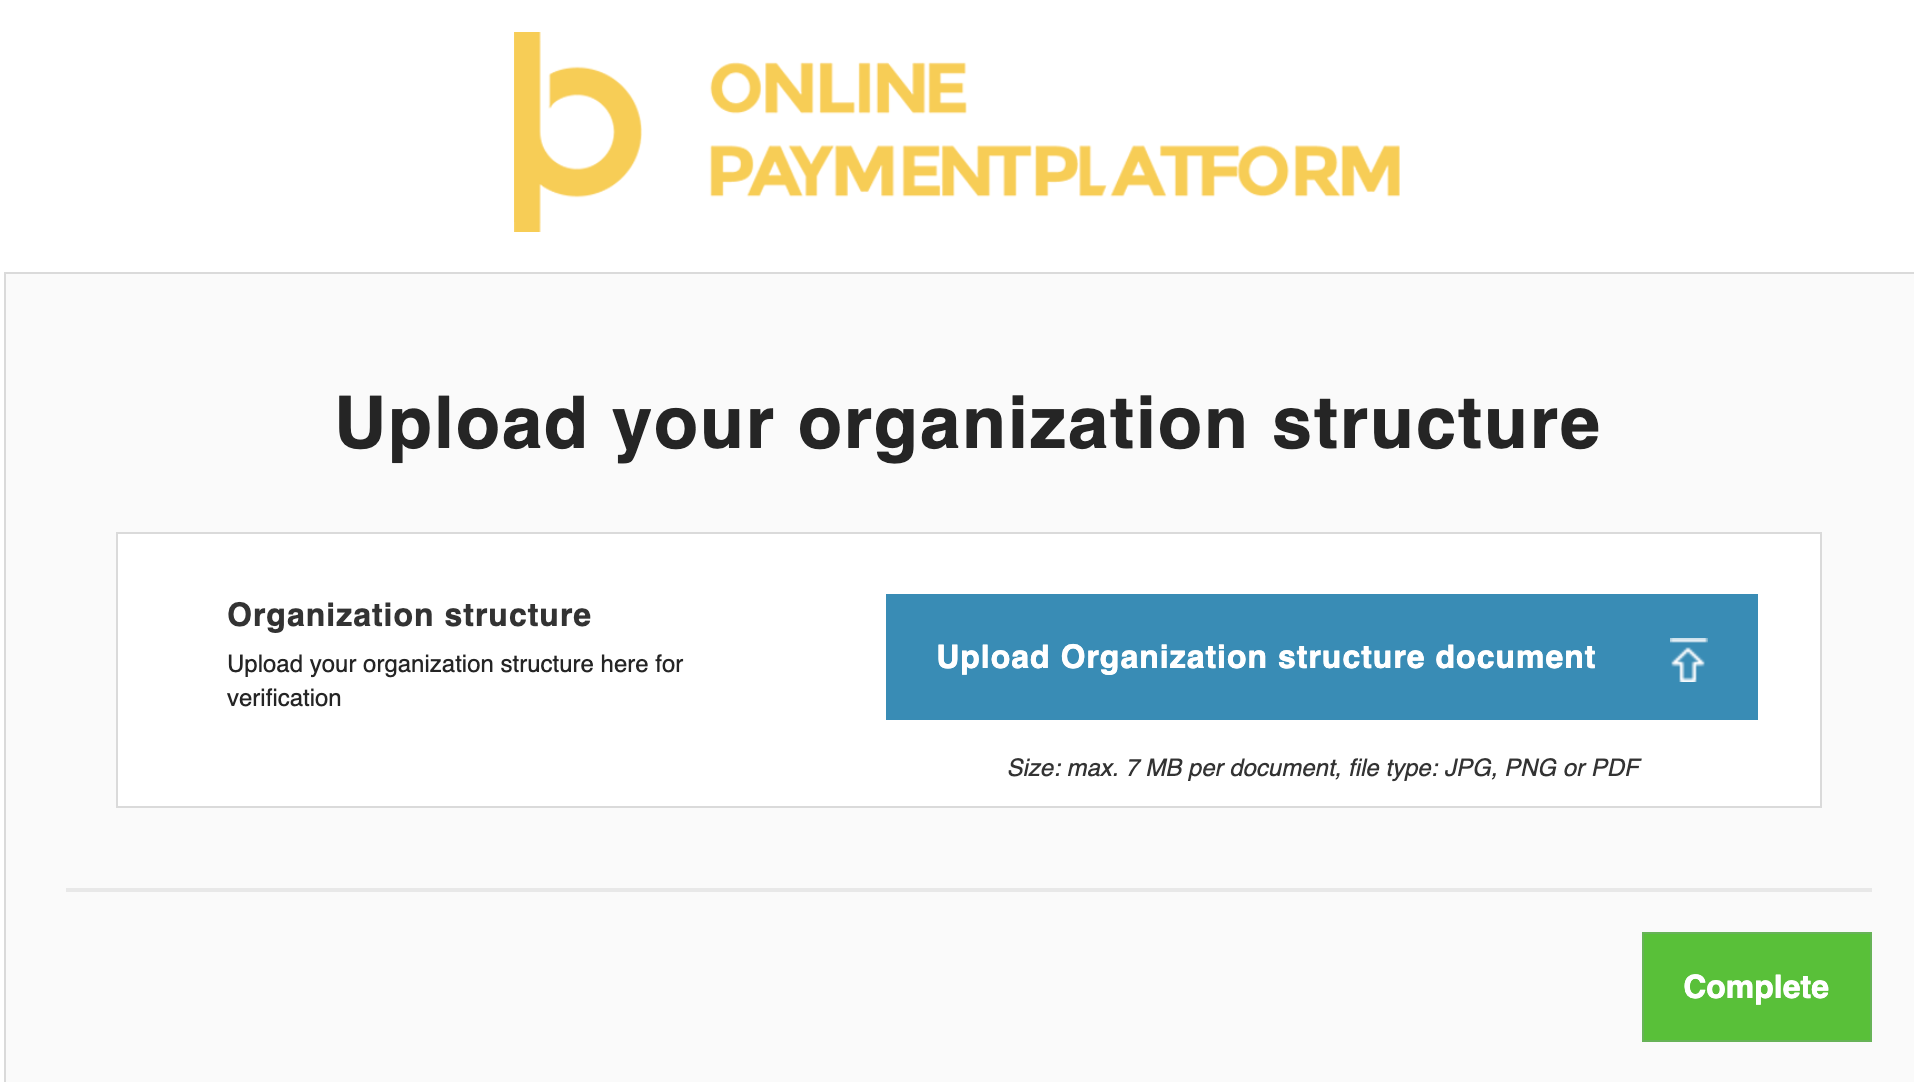
5.4. Organization structure
In case our compliance department is unable to create an organization structure, e.g. because parts are unknown by the Chamber of Commerce, you might be required to deliver this to us.
In that case, you will find the organization_structure.required type of requirement in your compliance requirements.
There are three ways to fulfill this requirement:
- Use the compliance overview_url.
- Use the verification_url.
- Verify using the Files API.
object_redirect_url to fulfill this requirement.
{
    "uid": "{{merchant_uid}}",
    "object": "merchant",
    ...
    "compliance": {
        "level": 400,
        "status": "unverified",
        "requirements": [
            {
                "type": "organization_structure.required",
                "status": "unverified",
                "object_type": null,
                "object_uid": null,
                "object_url": null,
                "object_redirect_url": "https://sandbox.onlinebetaalplatform.nl/en/{{partner_name}}/merchants/{{merchant_uid}}/verifications/organization-structure/feabfd98b2a9d246a6e33742f92af061059b9f81"
            }
        ]
    },
    ...
}
An example of the url can be found below:
The organization structure can also be uploaded using our Files API as follows. If you wish to create a seamless and smoother user experience while making sure the merchants upload their files without you having to process any sensitive data, then you can rely on the Files API to send us all documents necessary to do the KYC. This consists out of two steps.
5.4.3.1 Create a one time File Link
You first need to send a POST request to the Files upload endpoint and specify in the parameters the purpose of the file, ‘coc_extract’ and provide the UID for which the upload is to be used.
POST https://files-sandbox.onlinebetaalplatform.nl/v1/uploads
{
     "purpose": "organization_structure",
     "merchant_uid": "{{merchant_uid}}",
     "object_uid": "{{merchant_uid}}"
}
That leads to the following response:
{
     "uid": "{{file_uid}}",
     "created": "1606003200",
     "updated": "1606003200",
     "expired": "1606004100",
     "merchant_uid": "{{merchant_uid}}",
     "object_uid": "{{merchant_uid}}",
     "purpose": "organization_structure",
     "token": "{{token}}",
     "url": "https://files-sandbox.onlinebetaalplatform.nl/v1/uploads/{{file_uid}}"
}
5.4.3.2. Upload the file
In order to finish the operation, you need to send the file via a POST request to the endpoint https://api-sandbox.onlinebetaalplatform.nl/v1/{{file_uid}}.
In the headers of this request, you need to provide the token you previously stored in the field x-opp-files-token and the file in a FILE parameter.
POST https://files-sandbox.onlinebetaalplatform.nl/v1/uploads/{{file_uid}}

Headers
{
    "x-opp-files-token": "{{token}"
}

Parameters
{
     "file": "{{file}}"
}
Change Bank account
Occasionally, merchants would like to change their IBAN for payouts, because of many reasons. Research has shown us that many partners get these questions, and forward them to the OPP support team. You can create a button to change the IBAN account for payouts as follows.
Please note that whenever a new bank_account is created, the old bank_account cannot be used for payouts anymore. In case the merchant has second thoughts, and does want the first bank_account for payouts, (s)he will have to verify it again.
Step 1: Check whether the merchant has a bank_account with status new
First, we must find out whether the merchant already has a bank_account that can be filled. This is an important step, to keep your, and our database free of noise. Besides that, every time a new bank_account is created, the old bank_account will not be used for payouts anymore. This means that eventually, the merchant could not have a connected IBAN at all, if we do not keep track.
Find the merchant bank_accounts, and filter the status new by using the following call:
GET https://api-sandbox.onlinebetaalplatform.nl/v1/merchants/{{merchant_uid}}/bank_accounts?filter[status]=new
Step 2.1: Merchant already has an outstanding bank_account
Get the bank_account with status new, and redirect the user to the verification_url.
    {
    "uid": "{{bank_account_uid}}",
    "object": "bank_account",
    "created": 1554200096,
    "updated": 1554200096,
    "verified": null
    "verification_url": "https://onlinebetaalplatform.nl/nl/
     {{partner_name}}/merchants/{{merchant_uid}}/verificatie/
     bankgegevens/{{bank_account_uid}}/7a8d3c308b0739ef96320720017d070533912548",
    "status": "new",
    ...
}
After the merchant has gone through the process, you will receive a notification with type bank_account.status.changed. The status is now pending.
After our compliance department has checked the new bank_account, you will again receive a notification with type bank_account.status.changed.
This can either be approved, or disapproved. When approved, the bank_account will be used for payouts.
Step 2.2: Merchant has no outstanding bank_account
Create a new bank_account, as described in the Docs. Then redirect the user to the verification_url.
After the merchant has gone through the process, you will receive a notification with type bank_account.status.changed. The status is now pending.
After our compliance department has checked the new bank_account, you will again receive a notification with type bank_account.status.changed.
This can either be approved, or disapproved. When approved, the bank_account will be used for payouts.
Compliance
A merchant can be a consumer or a business entity and each has its own set of KYC (Know Your Customer) compliance requirements. OPP is obliged to do this KYC check, to see if the consumer or business has been in touch with illegal activities, like money laundering or finance of terrorism, or other frauds.
The merchant object contains the ‘compliance’ object. This object contains details on the merchant's current compliance level (1) , compliance status (2) and lists the compliance requirements (3) the merchant should meet to get a verified compliance status. An unverified compliance status results in not being able to receive payouts.
Receive the merchant object using this call:
GET https://api.onlinebetaalplatform.nl/v1/merchants/{{merchant_uid}}
{
    "uid": "{{merchant_uid}}",
    "object": "merchant",
    ...
    "compliance": {
        "level": 200,
        "status": "unverified",
        "requirements": [
    {
        "type": "bank_account.verification.required",
        "status": "unverified",
        "object_uid": {{bank_account_uid}},
        "object_type": "bank_account",
        "object_url": "https://api-sandbox.onlinebetaalplatform.nl/v1/merchants/...",
        "object_redirect_url": https://sandbox.onlinebetaalplatform.nl/...
    }
]
    },
    ...
}
Compliance levels
The compliance levels determine which compliance requirements the merchant should meet.
| Compliance levels | |
| 100 |
Merchant has been created but does not yet have a linked bank account. Transactions can be created on level 100 but cannot yet be paid out to the merchant. |
| 200 Low KYC |
Once the partner creates a bank account object for the merchant, the compliance level of the merchant is updated to 200. OPP will review the bank account information provided and once approved the merchant can receive payouts of the money on the bank account. Thresholds: the standard thresholds for Level 200 merchants are € 250,- in one transaction or € 1.500,- in lifetime volume. After which the merchant is required to identify itself before payouts can be reactivated. This threshold can be adjusted based on the risk profile and assessment of the platform or marketplace. |
| 400 High KYC |
If the merchant passes the threshold the compliance level is updated to 400 and is obliged to confirm his or her identity. The merchant can do this by uploading an identity document or by performing a local identification method (such as iDIN or itsme). |
Compliance status
The compliance status determines whether or not a merchant is able to receive payouts. You may expect the following states:
| Compliance statuses | |
| Unverified | Merchant is unverified and unable to receive payouts. Merchant should meet all unverified ‘compliance requirements’ to get to the ‘verified’ state. Unverified means that no verifications have been done yet, or delivered verifications have been disapproved. |
| Pending | Merchant compliance status is pending and is unable to receive payouts. OPP is currently reviewing the merchant's updated ‘compliance requirements’. |
| Verified | Merchant compliance status is verified and the merchant is able to receive payouts. |
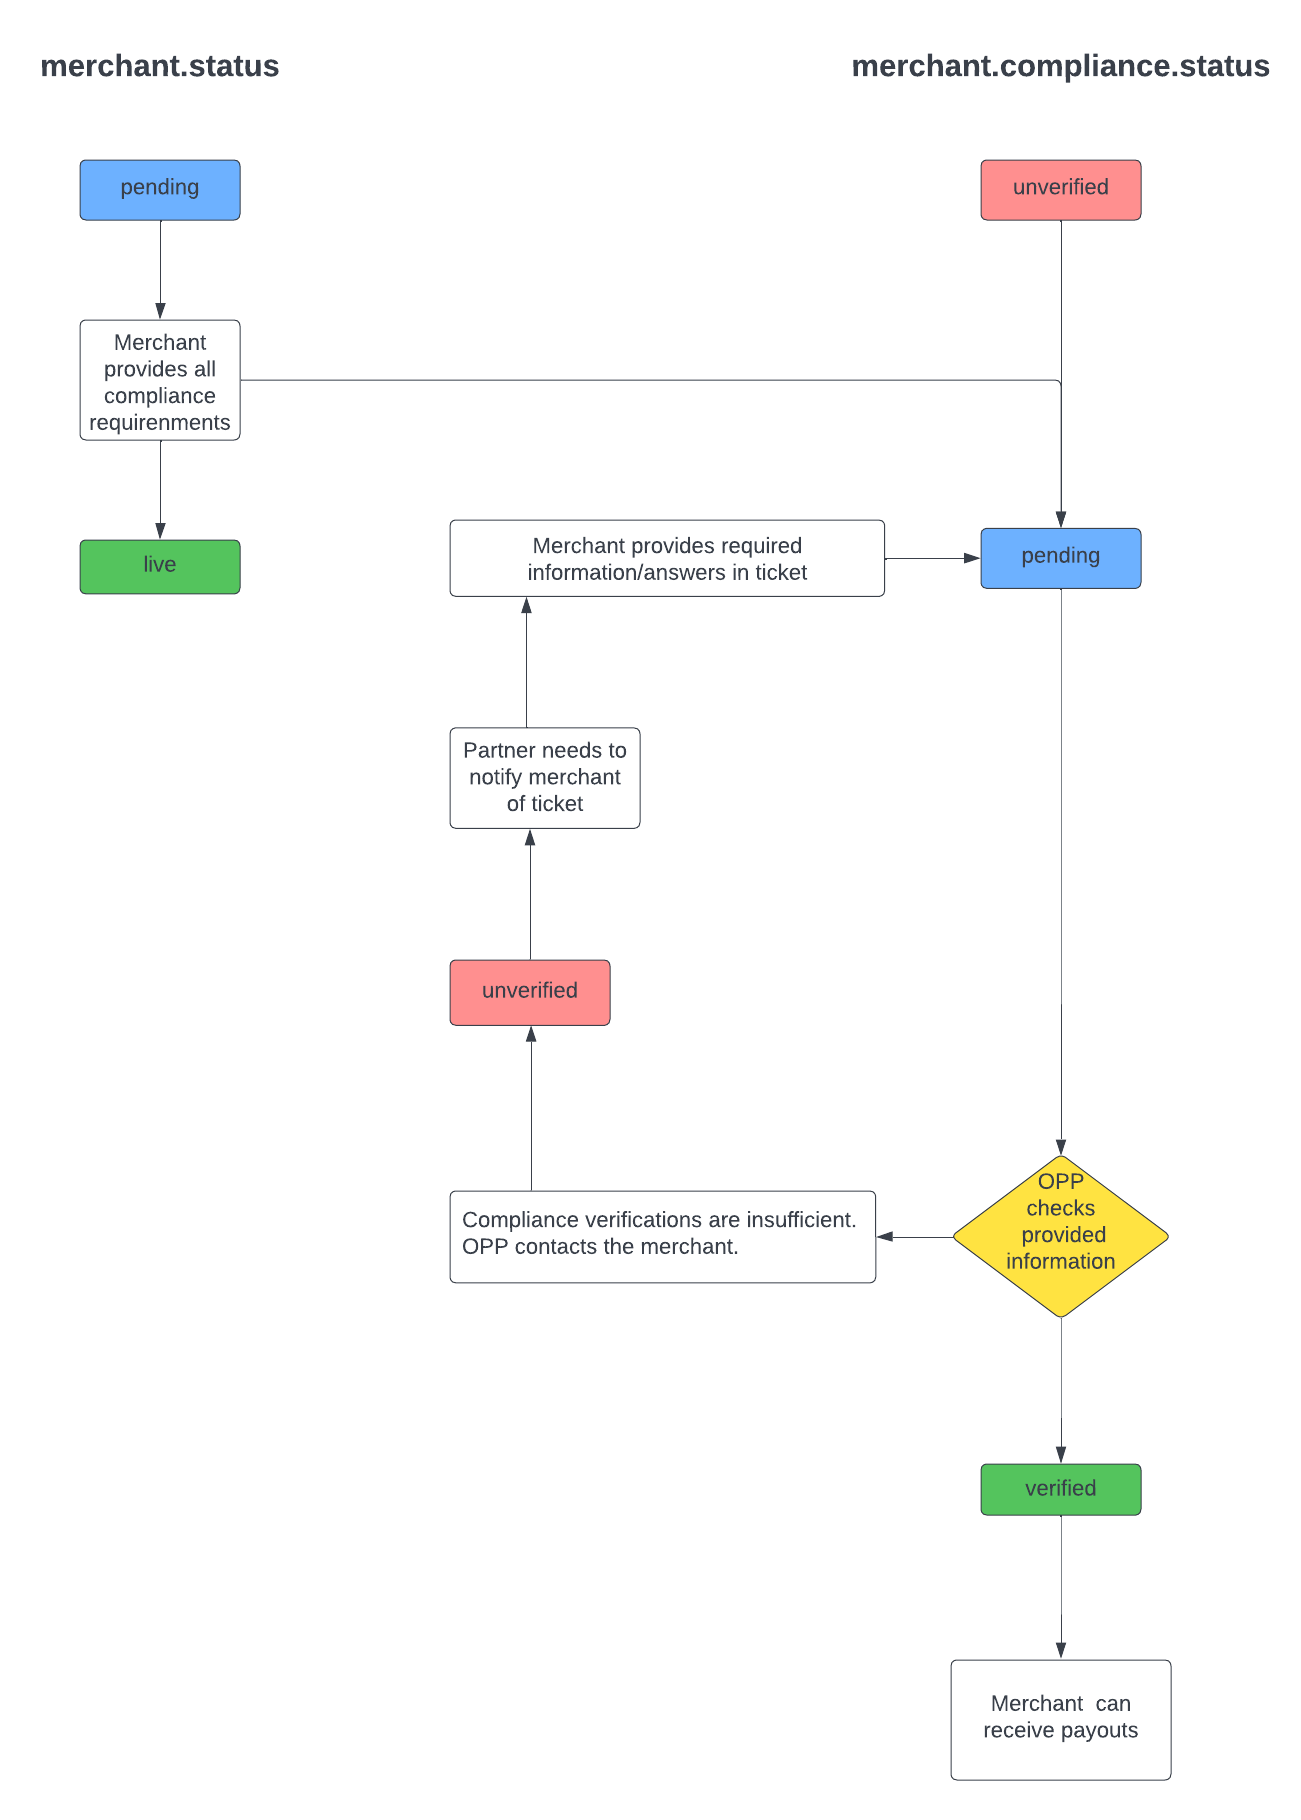
Merchant onboarding process
The flow below illustrates how the Merchant status and the Merchant Compliance Status change over the course of the onboarding process. It additionally shows when you as a Partner need to take action as a consequence of the merchant providing insufficient documents and when the merchant will need to take action.
Compliance requirements
Each compliance requirement states the compliance requirement type and details of the related object. A merchant can be redirect to object_redirect_url in order to get to the whitelabel OPP page where the required actions will be explained and can be finalized. It is also possible to provide your own redirect URL and seamlessly integrate these compliance requirement steps.
| Compliance requirements | |
| bank_account.required | No bank account available while at least one is required. |
| bank_account.verification.required | No verified bank account available while at least one verified bank account is required. |
| contact.verification.required | No verified merchant contact available. |
| contact.phonenumber.required | No phonenumber available, while at least one is required. |
| contact.phonenumber.verification.required | No verified phonenumber available, while at least one is required. |
| coc_extract.required | ( BUSINESS ONLY! ) Compliance does not have a state of the art extract, and will trigger the option to deliver it. |
| organization_structure.required | ( BUSINESS ONLY! ) Compliance cannot create a clear view on the organization structure, and will trigger the option to deliver it. |
| ubo.required | ( BUSINESS ONLY! ) Compliance found that an UBO is required, and will trigger the option to verify. |
| ubo.verification.required | ( BUSINESS ONLY! ) The merchant has to fill / verify all UBO’s. |
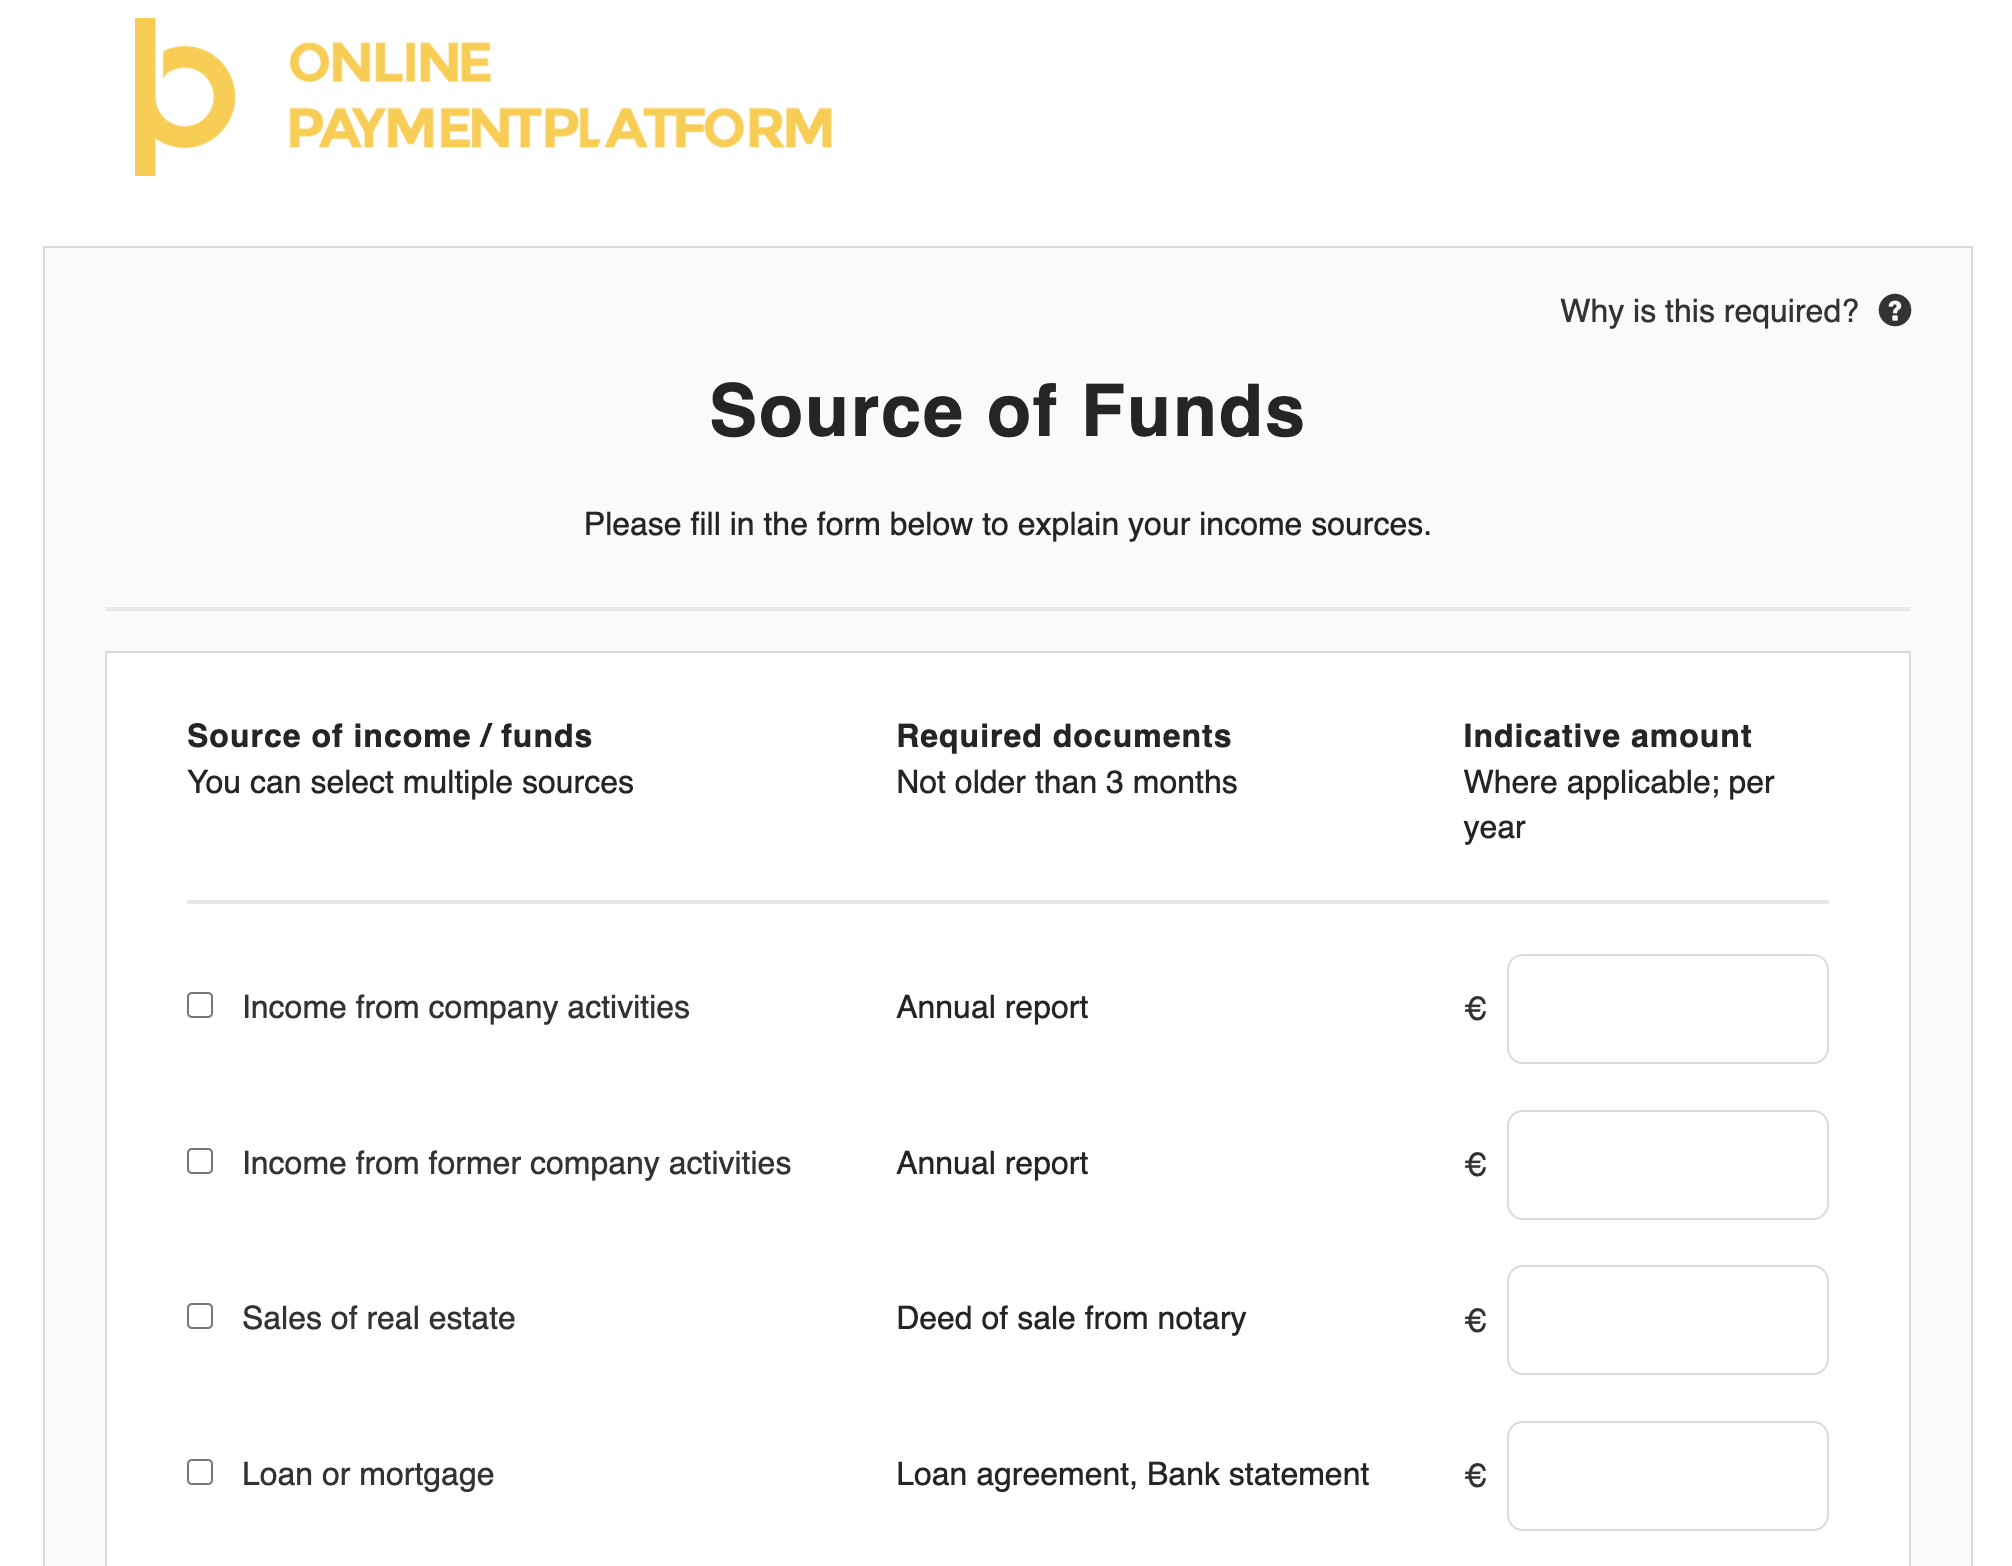
Source of Funds
When certain thresholds are met or transaction monitoring raises a flag, our compliance team can trigger a source of funds requirement. The source of funds requirement allows us to do research to where the amount of money came from. Most often, this will be used in Donation or Crowdfunding solutions.
When this is triggered, you will see the source_of_funds.required requirement in the merchant compliance object.
}
  ...
        "requirements": [
            {
                "type": "source_of_funds.required",
                "status": "unverified",
                "object_type": "source_of_fund",
                "object_uid": "{{sof_uid}}",
                "object_url": null,
                "object_redirect_url": "https://sandbox.onlinebetaalplatform.nl/nl/testindividual/merchants/{{merchant_uid}}/verificaties/bron-van-de-middelen/{{sof_uid}}/5fa9a435b8b66267aaddb2db48dfe9a74b7e544f"
            }
        ]
    },
  ...
}
To verify the source of funds, we can follow three routes:
- Use the compliance overview_url.
- Use the object_redirect_url.
- Verify using the Files API.
In all cases OPP will send a notification right after the verification took place.
The compliance requirement source_of_funds.required status will be pending until OPP has performed a compliance check.
1. Verify the source of funds requirement by redirecting the merchant to the compliance overview_url
You can find the overview_url in the merchant compliance object. Find the overview_url in the compliance object within the merchant and redirect the user to this url.
{
    "uid": "{{merchant_uid}}",
    "object": "merchant",
    ...
    "compliance": {
        "level": 400,
        "status": "unverified",
        "overview_url": "https://sandbox.onlinebetaalplatform.nl/en/{{partner_slug}}/{{merchant_uid}}/15c0bdb17283475ec5f274cad0a2a0245dda11ff/overview",
        "requirements": [
            {
                "type": "source_of_funds.required",
                "status": "unverified",
                "object_type": "source_of_fund",
                "object_uid": "{{sof_uid}}",
                "object_url": null,
                "object_redirect_url": "https://sandbox.onlinebetaalplatform.nl/en/{{partner_slug}}/merchants/{{merchant_uid}}/verifications/source-of-funds/{{sof_uid}}/5fa9a435b8b66267aaddb2db48dfe9a74b7e544f"
            }
        ]
    },
    ...
}
An example of this url can be found below.
2. Verify the source of funds requirement by redirecting the merchant to the object_redirect_url.
You can find the object_redirect_url in the merchant compliance.requirements.
Find the requirement with type source_of_funds.required and redirect the merchant to the object_redirect_url.
{
    "uid": "{{merchant_uid}}",
    "object": "merchant",
    ...
    "compliance": {
        "level": 200,
        "status": "unverified",
        "overview_url": "https://sandbox.onlinebetaalplatform.nl/en/{{partner_slug}}/{{merchant_uid}}/15c0bdb17283475ec5f274cad0a2a0245dda11ff/overview",
        "requirements": [
            {
                "type": "source_of_funds.required",
                "status": "unverified",
                "object_type": "source_of_fund",
                "object_uid": "{{sof_uid}}",
                "object_url": null,
                "object_redirect_url": "https://sandbox.onlinebetaalplatform.nl/en/{{partner_slug}}/merchants/{{merchant_uid}}/verifications/source-of-funds/{{sof_uid}}/5fa9a435b8b66267aaddb2db48dfe9a74b7e544f"
            }
        ]
    },
    ...
}
An example of this url can be found below.
3. Verify the source of funds requirement by using the Files API.
If you wish to create a seamless and smoother user experience while making sure the merchants upload their files without you having to process any sensitive data, then you can rely on the Files API to send us all documents necessary to do the KYC. This consists out of two steps.
3.1. Create a one time File Link
The source of funds can have several purposes. Decide which one you are using before uploading the file.
- source_of_fund_company_activities
- source_of_fund_former_company_activities
- source_of_fund_sales_of_real_estate
- source_of_fund_loan_or_mortgage
- source_of_fund_sales_of_investments
- source_of_fund_savings
- source_of_fund_inheritance
- source_of_fund_donation
- source_of_fund_work_or_pension
- source_of_fund_other_sources
You first need to send a POST request to the Files upload endpoint and specify in the parameters the purpose of the file and provide the UID for which the upload is to be used.
POST https://files-sandbox.onlinebetaalplatform.nl/v1/uploads
{
     "purpose": "source_of_fund_savings",
     "merchant_uid": "{{merchant_uid}}",
     "object_uid": "{{merchant_uid}}"
}
That leads to the following response:
{
     "uid": "{{file_uid}}",
     "created": "1606003200",
     "updated": "1606003200",
     "expired": "1606004100",
     "merchant_uid": "{{merchant_uid}}",
     "object_uid": "{{merchant_uid}}",
     "purpose": "source_of_fund_savings",
     "token": "{{token}}",
     "url": "https://files-sandbox.onlinebetaalplatform.nl/v1/uploads/{{file_uid}}"
}
3.4.2. Upload the file
In order to finish the operation, you need to send the file via a POST request to the endpoint https://api-sandbox.onlinebetaalplatform.nl/v1/{{file_uid}}.
In the headers of this request, you need to provide the token you previously stored in the field x-opp-files-token and the file in a FILE parameter.
POST https://files-sandbox.onlinebetaalplatform.nl/v1/uploads/{{file_uid}}

Headers
{
    "x-opp-files-token": "{{token}"
}

Parameters
{
     "file": "{{file}}"
}
Transactions
A transaction needs to be created whenever a service or product is sold. Transactions are created using the Transaction API. Transactions can be created as soon as a merchant_uid is known.
OPP provides a few different types of flows. You can choose between having a direct payment or email transaction flow, using the OPP whitelabel pages or use the seamless integration with the issuer. These different flows and using different payment methods are explained below with example requests and responses.
Create Transaction
As soon as a merchant is created, you can start doing transactions.
Please note that payouts of transactions only take place when the merchant's compliance.status = verified and the merchant.status = live.
Creating a transaction consists of three steps
- Create a transaction.
- Redirect the user.
- Handle the return.
1. Create a transaction.
There are two possible flows here:
- Use the payment screen of OPP
- Redirect the user to the acquirer.
1.1. Use the payment screen of OPP.
You do not need to provide any additional fields in your request in order to use our payment screen.
The redirect_url will show you an overview of the payment methods available for your platform, except for direct debit transactions.
1.2. Redirect the user to the acquirer.
You can redirect the user directly to the acquirer if preferred. In that case, the user will not reach to the OPP screen. The redirect_url will immediately forward the user to the page of the acquirer.
In order to do so, you will need to add the following fields to the request:
payment_method- One of the possible payment methods for your platform. See Payment Methods
Some payment methods need more information before redirecting to the acquirer. In that case the user will first be redirected to the pages of OPP to provide that information. All other payment methods, except the given payment method, will not be visible.
The minimal required fields to create a transaction are: merchant_uid, products, total_price, return_url and notify_url.
The notify_url is the webhook URL used by OPP for notifications of status changes.
The return_url is the URL to which the user will be redirected after the payment. We suggest to use the same page in all cases and handle the result as a listener on that page.
1.1 Example request
To create a single transaction, you can use the following example.
POST https://api-sandbox.onlinebetaalplatform.nl/v1/transactions
{
    "merchant_uid": "{{merchant_uid}}",
    "products": [
        {
            "name": "WakeUp Light",
            "price": 250,
            "quantity": 1
        }
    ],
    "return_url": "https://platform.example.com/return/",
    "notify_url": "https://platform.example.com/notify/",
    "total_price": 250,
    "checkout": false,
    "metadata":
      {
        "external_id": "2015486"
      }
}
1.2 Example response
{
    "uid": "{{transaction_uid}}",
    "object": "transaction",
    "created": 1613741183,
    "updated": 1613741183,
    "completed": null,
    "merchant_uid": "{{merchant_uid}}",
    "profile_uid": "{{profile_uid}}",
    "has_checkout": false,
    "payment_method": null,
    "payment_flow": "direct",
    "payment_details": [],
    "amount": 250,
    "return_url": "https://platform.example.com/return/",
    "redirect_url": "https://sandbox.onlinebetaalplatform.nl/nl/6bfa1c3e1d1d/betalen/verzendgegevens/{{transaction_uid}}?vc=db2242295ee6565a7b2c8b69632ff530",
    "notify_url": "https://platform.example.com/notify/",
    "status": "created",
    ...
}
After creating the transaction you will receive a response containing the transaction_uid. The status of the transaction is now created.
1.3 Actions
The transaction object contains two fields that you will need to save in your database:
transaction_uid- The Transaction UID, this is the unique identifier of the created transaction.status- The transaction status.
Ofcourse, other values can be saved in your database as well, if that is preferred by you. These two values are important for the flows in your platform.
Now that you have created the transaction, you need to redirect the user in order to pay the transaction.
Make sure to do this as soon as possible, as each transaction has an expiration time of 15 minutes.
If the user has not finished the payment within this time, the transaction will expire. The transaction status will then be expired, and you will receive a transaction.status.changed notification.
After this, a new transaction needs to be created.
2. Redirect the user.
After creating a transaction, the user needs to be redirected to the redirect_url.
An example of the OPP redirect_url can be found below.
![]()
Once the user clicks the redirect_url and is redirected to either our pages or that of the acquirer, the status of the transaction will become pending.
As soon as the user is redirected to the redirect_url, you will receive a transaction.status.changed notification.
If the user has not finished the payment within this time, the transaction will expire and a new transaction needs to be created.
The transaction status will then be expired, and you will again receive a transaction.status.changed notification.
After a (un)successful payment, or cancellation, the user will always be redirected to the return_url.
Now that the user has been redirected to the payment page, we need to handle the result.
3. Handle the result.
In all cases, the user will always be redirected back to the return_url.
We suggest to use the same page in all cases and handle the result as a listener on that page.
Best practise is to use a screen which shows a loader and a text like:
You're payment is being processed.
As soon as we have a result from the issuer, we will send a transaction.status.changed notification to your notify_url. According to the status that you retrieve afterwards, you should show the user a page with the correct status.
{
  "uid": "{{notification_uid}}",
  "type": "transaction.status.changed",
  "created": 1621944238,
  "object_uid": "{{transaction_uid}}",
  "object_type": "transaction",
  "object_url": "https://api-sandbox.onlinebetaalplatform.nl/v1/transactions/{{transaction_uid}}",
  "verification_hash": "f81fed5c48918d81aac3aaa07ac34c99e126685ff7e77b9fedca244c50255091"
}
There are a couple of statuses possible in this scenario:
cancelled- The user has manually cancelled the payment, perhaps because the chosen payment method was not desired. You should ask the user to try again, and create a new transaction.failed- The payment has failed, for example because the user did not enter correct issuer credentials, there was not enough funds, or there was a technical error during the payment. You should ask the user to try again, and create a new transaction.expired- The user has not managed to complete the payment within the set time. You should ask the user to try again, and create a new transaction.completed- The user has succesfully paid the order. You should show a success page and lead the user further on in the process of your platform.
For all statuses, please have a look at our documentation.
Escrow
OPP provides the option to put money in escrow. By doing this, you can somewhat give a guaranteed feeling to buyer and seller and in the meantime have more control over when the money is released to the seller. OPP will put the money in the settlement of the merchant, only when the escrow period ends, or is manually ended by you as a partner.
Creating a transaction with escrow consists of three steps
- Create a transaction.
- Redirect the user.
- Handle the return.
1. Create a transaction.
There are two possible flows here:
- Use the payment screen of OPP
- Redirect the user to the acquirer.
1.1. Use the payment screen of OPP.
You do not need to provide any additional fields in your request in order to use our payment screen.
The redirect_url will show you an overview of the payment methods available for your platform, except for direct debit transactions.
1.2. Redirect the user to the acquirer.
You can redirect the user directly to the acquirer if preferred. In that case, the user will not reach to the OPP screen. The redirect_url will immediately forward the user to the page of the acquirer.
In order to do so, you will need to add the following fields to the request:
payment_method- One of the possible payment methods for your platform. See Payment Methods
Some payment methods need more information before redirecting to the acquirer. In that case the user will first be redirected to the pages of OPP to provide that information. All other payment methods, except the given payment method, will not be visible.
The minimal required fields to create a transaction are: merchant_uid, products, total_price, return_url and notify_url.
The notify_url is the webhook URL used by OPP for notifications of status changes.
The return_url is the URL to which the user will be redirected after the payment. We suggest to use the same page in all cases and handle the result as a listener on that page.
Now, to actually use the escrow, you can choose to use one out of two options:
- Escrow period: Define a specific period in days which starts counting once the transaction is paid. Use
escrow = truecombined withescrow_period - Escrow date: Define a specific date and time until which the money is held in escrow. Use
escrow = truecombined withescrow_date
1.1 Example request
To create a single transaction with esvrow, you can use the following example.
POST https://api-sandbox.onlinebetaalplatform.nl/v1/transactions
{
    "merchant_uid": "{{merchant_uid}}",
    "products": [
        {
            "name": "WakeUp Light",
            "price": 250,
            "quantity": 1
        }
    ],
    "return_url": "https://platform.example.com/return/",
    "notify_url": "https://platform.example.com/notify/",
    "total_price": 250,
    "checkout": false,
    "escrow: true",
    "escrow_period: 14",
    "metadata":
      {
        "external_id": "2015486"
      }
}
1.2 Example response
{
    "uid": "{{transaction_uid}}",
    "object": "transaction",
    "created": 1613741183,
    "updated": 1613741183,
    "completed": null,
    "merchant_uid": "{{merchant_uid}}",
    "profile_uid": "{{profile_uid}}",
    "has_checkout": false,
    "payment_method": null,
    "payment_flow": "direct",
    "payment_details": [],
    "amount": 250,
    "return_url": "https://platform.example.com/return/",
    "redirect_url": "https://sandbox.onlinebetaalplatform.nl/nl/6bfa1c3e1d1d/betalen/verzendgegevens/{{transaction_uid}}?vc=db2242295ee6565a7b2c8b69632ff530",
    "notify_url": "https://platform.example.com/notify/",
    "status": "created",
    ...
}
After creating the transaction you will receive a response containing the transaction_uid. The status of the transaction is now created.
1.3 Actions
The transaction object contains two fields that you will need to save in your database:
transaction_uid- The Transaction UID, this is the unique identifier of the created transaction.status- The transaction status.
Ofcourse, other values can be saved in your database as well, if that is preferred by you. These two values are important for the flows in your platform.
Now that you have created the transaction, you need to redirect the user in order to pay the transaction.
Make sure to do this as soon as possible, as each transaction has an expiration time of 15 minutes.
If the user has not finished the payment within this time, the transaction will expire. The transaction status will then be expired, and you will receive a transaction.status.changed notification.
After this, a new transaction needs to be created.
2. Redirect the user.
After creating a transaction, the user needs to be redirected to the redirect_url.
An example of the OPP redirect_url can be found below.
![]()
Once the user clicks the redirect_url and is redirected to either our pages or that of the acquirer, the status of the transaction will become pending.
As soon as the user is redirected to the redirect_url, you will receive a transaction.status.changed notification.
If the user has not finished the payment within this time, the transaction will expire and a new transaction needs to be created.
The transaction status will then be expired, and you will again receive a transaction.status.changed notification.
After a (un)successful payment, or cancellation, the user will always be redirected to the return_url.
Now that the user has been redirected to the payment page, we need to handle the result.
3. Handle the result.
In all cases, the user will always be redirected back to the return_url.
We suggest to use the same page in all cases and handle the result as a listener on that page.
Best practise is to use a screen which shows a loader and a text like:
You're payment is being processed.
As soon as we have a result from the issuer, we will send a transaction.status.changed notification to your notify_url. According to the status that you retrieve afterwards, you should show the user a page with the correct status.
{
  "uid": "{{notification_uid}}",
  "type": "transaction.status.changed",
  "created": 1621944238,
  "object_uid": "{{transaction_uid}}",
  "object_type": "transaction",
  "object_url": "https://api-sandbox.onlinebetaalplatform.nl/v1/transactions/{{transaction_uid}}",
  "verification_hash": "f81fed5c48918d81aac3aaa07ac34c99e126685ff7e77b9fedca244c50255091"
}
There are a couple of statuses possible in this scenario:
cancelled- The user has manually cancelled the payment, perhaps because the chosen payment method was not desired. You should ask the user to try again, and create a new transaction.failed- The payment has failed, for example because the user did not enter correct issuer credentials, there was not enough funds, or there was a technical error during the payment. You should ask the user to try again, and create a new transaction.expired- The user has not managed to complete the payment within the set time. You should ask the user to try again, and create a new transaction.planned/reserved- The user has succesfully paid the order. You should show a success page and lead the user further on in the process of your platform.
For all statuses, please have a look at our documentation.
Releasing the funds
Normally, the funds are automatically released when the escrow_period or escrow_date ends.
In case you want to manually end the escrow, for example when the product was delivered to and accepted by the buyer, you can do so by updating the escrow_date to any time between the creation date and now.
POST https://api-sandbox.onlinebetaalplatform.nl/v1/transactions/{{transaction_uid}}
{
    {
        "escrow_date": "2021-04-30 09:00:00"
    }
}
You will receive a notification transaction.status.changed. The transaction will now have status completed, and be settled on the settlement of the merchant.
Once the transaction is out of escrow, the partner_fee will become available and the transaction costs for this transaction will be charged.
Extending the escrow
In case you want to extend the current escrow period, because for example a dispute is created, you can do so by updating the escrow_date to any time in the future that suites your needs. Our advise would be to extend it no longer then three months.
POST https://api-sandbox.onlinebetaalplatform.nl/v1/transactions/{{transaction_uid}}
{
    {
        "escrow_date": "2021-04-30 09:00:00"
    }
}
Please note that the standard maximum escrow period is 365 days. In case you need a longer period of time, please contact your Implementation Manager.
SEPA Bank Transfer
As soon as a merchant is created, you can start doing transactions.
Please note that payouts of transactions only take place when the merchant's compliance.status = verified and the merchant.status = live.
1. Create a SEPA transaction.
The minimal required fields to create a transaction are: merchant_uid, products, total_price, return_url and notify_url.
When using SEPA bank transfer as your payment method, make sure to add this to your request.
payment_method=sepa
The notify_url is the webhook URL used by OPP for notifications of status changes.
The return_url is the URL to which the user will be redirected after the payment. We suggest to use the same page in all cases and handle the result as a listener on that page.
1.1 Example request
To create a single transaction, you can use the following example.
POST https://api-sandbox.onlinebetaalplatform.nl/v1/transactions
{
    "merchant_uid": "{{merchant_uid}}",
    "products": [
        {
            "name": "WakeUp Light",
            "price": 250,
            "quantity": 1
        }
    ],
    "return_url": "https://platform.example.com/return/",
    "notify_url": "https://platform.example.com/notify/",
    "total_price": 250,
    "checkout": false,
    "payment_method": "sepa",
    "metadata":
      {
        "external_id": "2015486"
      }
}
1.2 Example response
{
    "livemode": false,
    "uid": "{{transaction_uid}}",
    "object": "transaction",
    "created": 1625233235,
    "updated": 1625233235,
    "completed": null,
    "merchant_uid": "{{merchant_uid}}",
    "profile_uid": "{{profile_uid}}",
    "has_checkout": false,
    "payment_method": "sepa",
    "payment_flow": "direct",
    "payment_details": {
        "provider_bank_account_name": "Online Payments Foundation",
        "provider_bank_account_iban": "NL96INGB0674534352",
        "provider_bank_account_bic": "INGBNL2A",
        "reference": "QBF5ND",
        "expired": 1625349599
    },
    "amount": 250,
    "return_url": "https://platform.example.com/return/",
    "redirect_url": "https://sandbox.onlinebetaalplatform.nl/nl/6bfa1c3e1d1d/transactie/start/{{transaction_uid}}",
    "notify_url": "https://platform.example.com/notify/",
    "status": "created",
    ...
}
After creating the transaction you will receive a response containing the transaction_uid. The status of the transaction is now created.
1.3 Actions
The transaction object contains two fields that you will need to save in your database:
transaction_uid- The Transaction UID, this is the unique identifier of the created transaction.status- The transaction status.
Ofcourse, other values can be saved in your database as well, if that is preferred by you. These two values are important for the flows in your platform.
Now that you have created the transaction, you can either redirect the user in order to show the transaction details, or show them on your platform.
Keep in mind that the user needs to pay before the transaction expires. SEPA transactions expire after 7 days by default, but this can be extanded using date_expired in the request.
If the user has not finished the payment within this time, the transaction will expire. The transaction status will then be expired, and you will receive a transaction.status.changed notification.
After this, a new transaction needs to be created.
2. Show the payment details.
After creating a transaction, you can choose two flows:
- The user needs to be redirected to the
redirect_urlof OPP to see the payment details. - You show the payment details on your platform.
2.1 Redirect user to OPP.
An example of the OPP redirect_url can be found below.
![]()
When clicking either "Cancel transaction" or "To {{partner}}" , the user will always be redirected to the return_url.
2.2 You show the payment details on your platform.
In the response of the the transaction, you will find the payment_details. This shows the details that need to be used in order to do the bank transfer.
{
    "livemode": false,
    "uid": "{{transaction_uid}}",
    "object": "transaction",
    "created": 1625233235,
    "updated": 1625233235,
    "completed": null,
    "merchant_uid": "{{merchant_uid}}",
    "profile_uid": "{{profile_uid}}",
    "has_checkout": false,
    "payment_method": "sepa",
    "payment_flow": "direct",
    "payment_details": {
        "provider_bank_account_name": "Online Payments Foundation",
        "provider_bank_account_iban": "NL96INGB0674534352",
        "provider_bank_account_bic": "INGBNL2A",
        "reference": "QBF5ND",
        "expired": 1625349599
    },
    "amount": 250,
    "return_url": "https://platform.example.com/return/",
    "redirect_url": "https://sandbox.onlinebetaalplatform.nl/nl/6bfa1c3e1d1d/transactie/start/{{transaction_uid}}",
    "notify_url": "https://platform.example.com/notify/",
    "status": "created",
    ...
}
Show these details to the user on your platform.
Now that the user has done the payment, we need to handle the result.
3. Handle the result.
As soon as we received the funds, we will send a transaction.status.changed notification to your notify_url. According to the status that you retrieve afterwards, you should update the user and merchant accordingly.
{
  "uid": "{{notification_uid}}",
  "type": "transaction.status.changed",
  "created": 1621944238,
  "object_uid": "{{transaction_uid}}",
  "object_type": "transaction",
  "object_url": "https://api-sandbox.onlinebetaalplatform.nl/v1/transactions/{{transaction_uid}}",
  "verification_hash": "f81fed5c48918d81aac3aaa07ac34c99e126685ff7e77b9fedca244c50255091"
}
There are a couple of statuses possible in this scenario:
expired- The user has not managed to complete the payment within the set time. You should ask the user to try again, and create a new transaction.completedorreserved- The user has succesfully paid the order.
For all statuses, please have a look at our documentation.
SEPA Payment Reference
In case a specific merchant is receiving funds in a periodic way, a fixed payment reference might come in handy.
Please note that payouts of transactions only take place when the merchant's compliance.status = verified and the merchant.status = live.
1. Create a SEPA payment reference.
The minimal required fields to create a SEPA payment reference are: merchant_uid, reference and notify_url.
The notify_url is the webhook URL used by OPP for notifications of status changes.
1.1 Example request
To create a sepa payment reference, you can use the following example.
POST https://api-sandbox.onlinebetaalplatform.nl/v1/payment_references
{
    "merchant_uid": "{{merchant_uid}}",
    "code": "TEST0001",
    "notify_url": "https://platform.example.com/notify/"
}
1.2 Example response
    {
        "uid": "{{payment_reference_uid}}",
        "object": "payment_reference",
        "created": 1624371329,
        "updated": 1624371329,
        "code": "TEST0001",
        "notify_url": "https://platform.example.com/notify/",
        "payment_details": {
            "provider_bank_account_name": "Online Payments Foundation",
            "provider_bank_account_iban": "NL96INGB0674534352",
            "provider_bank_account_bic": "INGBNL2A"
        }
    }
1.3 Actions
From this moment onwards, anyone can transfer funds towards the correct IBAN, using the payment reference created.
2. Handle the result.
Now that the user has done the payment, we need to handle the result.
As soon as we received funds, we will send a payment_reference.transaction.registered notification to your notify_url. According to the that notification, you should update your database, and continue the flow towards the user and merchant.
Please note that OPP does not check whether the funds that were received actually are correct. It is up to the platform to check whether the amount is correct.
{
  "uid": "{{notification_uid}}",
  "type": "payment_reference.transaction.registered",
  "created": 1634039953,
  "object_uid": "{{transaction_uid}}",
  "object_type": "transaction",
  "object_url": "https://api-sandbox.onlinebetaalplatform.nl/v1/payment_references/pid_f7cae12da4e8/transactions/tra_785232c77b08",
  "parent_uid": "pid_f7cae12da4e8",
  "parent_type": "payment_reference",
  "parent_url": "https://api-sandbox.onlinebetaalplatform.nl/v1/payment_references/pid_f7cae12da4e8",
  "verification_hash": "85956117e49c725921e5eac3909e853c7c83ca0d33c20e54227d38bf223302c3"
}
The transaction object has been created automatically from the registered funds. You can see the information of the transaction directly by performing a GET request towards the object_url.
The transaction object contains two fields that you will need to save in your database:
transaction_uid- The Transaction UID, this is the unique identifier of the created transaction.status- The transaction status.
Ofcourse, other values can be saved in your database as well, if that is preferred by you. These two values are important for the flows in your platform.
Refunds
Within OPP we define two types of refunds. Chargebacks, and refunds. A chargeback is a full refund that is being refunded before the money was settled towards the seller. A refund can either be partial or full and might already been paid out to the seller.
Create a refund
1. Create a refund.
You can only create a refund for a transaction that has either status planned, reserved or completed.
You will need the transaction_uid that you saved in your database in order to perform the refund.
The minimal required fields to create a refund are: amount.
We always suggest to use a payout_description, to make sure the buyer knows what this refund belongs to.
1.1 Example request
To create a refund, you can use the following example.
POST https://api-sandbox.onlinebetaalplatform.nl/v1/transactions/{{transaction_uid}}/refunds
{
    "amount": 6750,
    "payout_description": "Invoice 2021012 not satisfied"
}
1.2 Example response
{
    "livemode": false,
    "uid": "{{refund_uid}}",
    "object": "refund",
    "created": 1623160335,
    "updated": 1623160335,
    "paid": null,
    "amount": 6750,
    "status": "created",
    "message": "as agreed",
    "internal_reason": "not satisfied",
    "fees": {},
    "payout_description": "Invoice 2021012 not satisfied"
}
After creating the refund you will receive a response containing the refund_uid. The status of the refund is now created.
1.3 Actions
The refund object contains one field that you will need to save in your database:
refund_uid- The Refund UID, this is the unique identifier of the created refund.
Ofcourse, other values can be saved in your database as well, if that is preferred by you. These two values are important for the flows in your platform.
Now that the refund is created, the transaction that you created this refund for, will get a status change.
{
  "uid": "{{notification_uid}}",
  "type": "transaction.status.changed",
  "created": 1621944238,
  "object_uid": "{{transaction_uid}}",
  "object_type": "transaction",
  "object_url": "https://api-sandbox.onlinebetaalplatform.nl/v1/transactions/{{transaction_uid}}",
  "verification_hash": "f81fed5c48918d81aac3aaa07ac34c99e126685ff7e77b9fedca244c50255091"
}
The status will now either be refunded or chargeback.
In case a transaction is still in escrow, and you provide a full refund, the transaction will then get status chargeback. In all other cases, it will get the status refunded. Do note that in case of a partial refund of a transaction in escrow, you will not get a notification of the completed status of the transaction. Only a notification of the refunded status will be sent.
We currently have no specific notifications on the refund itself. We pay out refunds on a daily base. The moment the buyer has its money back depends on two variables:
- Country of the buyer - If the country of the buyer is not The Netherlands, it might take a bit longer for the money to arrive.
- Chosen Payment Method - Depending on the payment method, the refund might be visible immediately or after a certain period of time.
Recurring Payments
Before you are able to create recurring payments, you will need to create a mandate. A mandate allows us as OPP to create a SEPA Direct Debits payment. Mandates are created using the Mandates API. Mandate transactions are created using the Mandate Transaction API. Mandates and transactions can be created as soon as a merchant_uid is known.
Recurring payments might be used for your subscription model in your platform. Please note that the use of recurring payments using SEPA Direct Debits is not without financial risk. Therefore, we will always ask you the following questions if you are willing to use this in your platform. Our compliance department will then review your application and see whether a deposit is needed to cover the risk.
- How many transactions will take place each month, and on which frequency?
- What is the average transaction amount?
- What is the maximum transaction amount?
- Have you used mandates & SEPA direct debit payments before? If yes, please show us a report on last year's chargebacks.
- What products or services are facilitated by the payments?
- What mandate method is being used? (see Mandate Methods).
- By default, SEPA direct debit payments are held in escrow for 30 days, because we know that is when the most chargebacks occur. Do you wish to extend or shorten the escrow period, or do you agree with the 30 days? If you'd like to shorten, please provide your reasoning.
Create Mandate
As soon as a merchant is created, you can start doing transactions.
Please note that payouts of transactions only take place when the merchant's compliance.status = verified and the merchant.status = live.
First of all, you need to create a mandate. A mandate allows us as OPP to create a SEPA direct debit payment in name of the platform, and forward this towards either the platform or a merchant on your platform.
Creating a mandate consists of three steps
- Create a mandate.
- Redirect the user.
- Handle the return.
1. Create a mandate.
There are different mandate types, and mandate methods available. Below you will find an explanation, including their risk level.
| Mandate Type | Core / Common / Consumer | Business |
| Can be used by | Consumers + Businesses | Businesses |
| Available Mandate Methods |
eMandate - Allow mandate by logging into your bank account (The Netherlands only) Payment - Allow mandate by performing a payment Form - Allow mandate by filling out a form Import - Allow mandate by importing current information |
eMandate - Allow mandate by logging into your bank account (The Netherlands only) Import - OPP creates a paper form that needs to be signed by both parties before importing in the bank |
| Risk | Mid - High. See Mandate methods | Low |
| Chargeback period | 8 weeks | 0 |
| Report incorrect mandate |
eMandate - 0 other - 13 months |
0 |
| Mandate revoked by OPP if | 2x chargeback, 1x report incorrect mandate, 1x blocked by user | 1x blocked by user |
1.1. Use eMandate as mandate method
You can redirect the user directly to the acquirer if preferred. In that case, the user will not reach the OPP screen. The redirect_url will immediately forward the user to the page of the acquirer.
In order to do so, you will need to add the following fields to the request:
issuer- Optional when the mandate method is emandate. If the issuer is left out, the user will first be redirected to the pages of OPP to select the issuer.
1.2. Use payment as mandate method
You can redirect the user directly to the acquirer if preferred. In that case, the user will not reach to the OPP screen. The redirect_url will immediately forward the user to the page of the acquirer.
In order to do so, you will need to add the following fields to the request:
payment_method- One of the possible mandate payment methods for your platform. See Mandate payment_methodmandate_amount- Amount used for mandate verification transaction in cents. In case this amount is higher then the verification amount (10 cents), this will also count as the first payment to the merchant.
Some payment methods need more information before redirecting to the acquirer. In that case the user will first be redirected to the pages of OPP to provide that information. All other payment methods, except the given payment method, will not be visible.
1.3. Use form as mandate method
You do not need to provide any additional fields in your request in order to use our form screen.
1.2. Use import as mandate method
You will need to deliver the bank details to your request:
bank_iban- Account holder's IBAN.bank_bic- Account holder's BIC.bank_name- Account holder's name.
The minimal required fields to create a mandate are: merchant_uid, mandate_method, mandate_type, mandate_repeat, products, total_price, return_url and notify_url.
The notify_url is the webhook URL used by OPP for notifications of status changes.
The return_url is the URL to which the user will be redirected after the mandate has completed or failed. We suggest to use the same page in all cases and handle the result as a listener on that page.
1.1 Example request
To create a mandate, you can use the following example.
    POST https://api-sandbox.onlinebetaalplatform.nl/v1/mandates
    {
        "merchant_uid": "{{merchant_uid}}",
        "mandate_method": "payment",
        "mandate_type": "consumer",
        "mandate_repeat": "subscription",
        "mandate_amount": 100,
        "products": [{
            "name": "Test product",
            "price": 2525,
            "quantity": 1
        }],
        "total_price": 2525,
        "return_url": "https://platform.example.com/return/",
        "notify_url": "https://platform.example.com/notify/"
    }
1.2 Example response
    {
        "livemode": false,
        "uid": "{{mandate_uid}}",
        "object": "mandate",
        "token": null,
        "created": 1625492691,
        "updated": 1625492691,
        "start": null,
        "end": null,
        "completed": null,
        "expired": 1625494491,
        "revoked": null,
        "amount": 100,
        "repeats": null,
        "interval": null,
        "description": null,
        "return_url": "https://platform.example.com/return/",
        "redirect_url": "https://sandbox.onlinebetaalplatform.nl/nl/6bfa1c3e1d1d/machtiging/verificatie-betaling/start/{{mandate_uid}}",
        "notify_url": "https://platform.example.com/notify/",
        "has_checkout": true,
        "skip_confirmation": false,
        "mandate_flow": "direct",
        "mandate_repeat": "subscription",
        "mandate_type": "consumer",
        "mandate_method": "payment",
        "payment_method": null,
        "status": "created",
        "customer": {},
        "order": {},
        "metadata": [],
        "statuses": []
    }
After creating the mandate you will receive a response containing the mandate_uid. The status of the mandate is now created.
1.3 Actions
The mandate object contains three fields that you will need to save in your database:
mandate_uid- The Mandate UID, this is the unique identifier of the created mandate.token- The Mandate token, this is the unique token belonging to this mandate and will become available on completing the mandate.status- The mandate status.
Ofcourse, other values can be saved in your database as well, if that is preferred by you. These three values are important for the flows in your platform.
Now that you have created the mandate, you need to redirect the user in order to complete the flow.
Make sure to do this as soon as possible, as each mandate has an expiration time of 30 minutes.
If the user has not finished the flow within this time, the mandate will expire. The mandate status will then be expired, and you will receive a mandate.status.changed notification.
After this, a new mandate needs to be created.
2. Redirect the user.
After creating a mandate, the user needs to be redirected to the redirect_url.
An example of the OPP redirect_url flow can be found below.
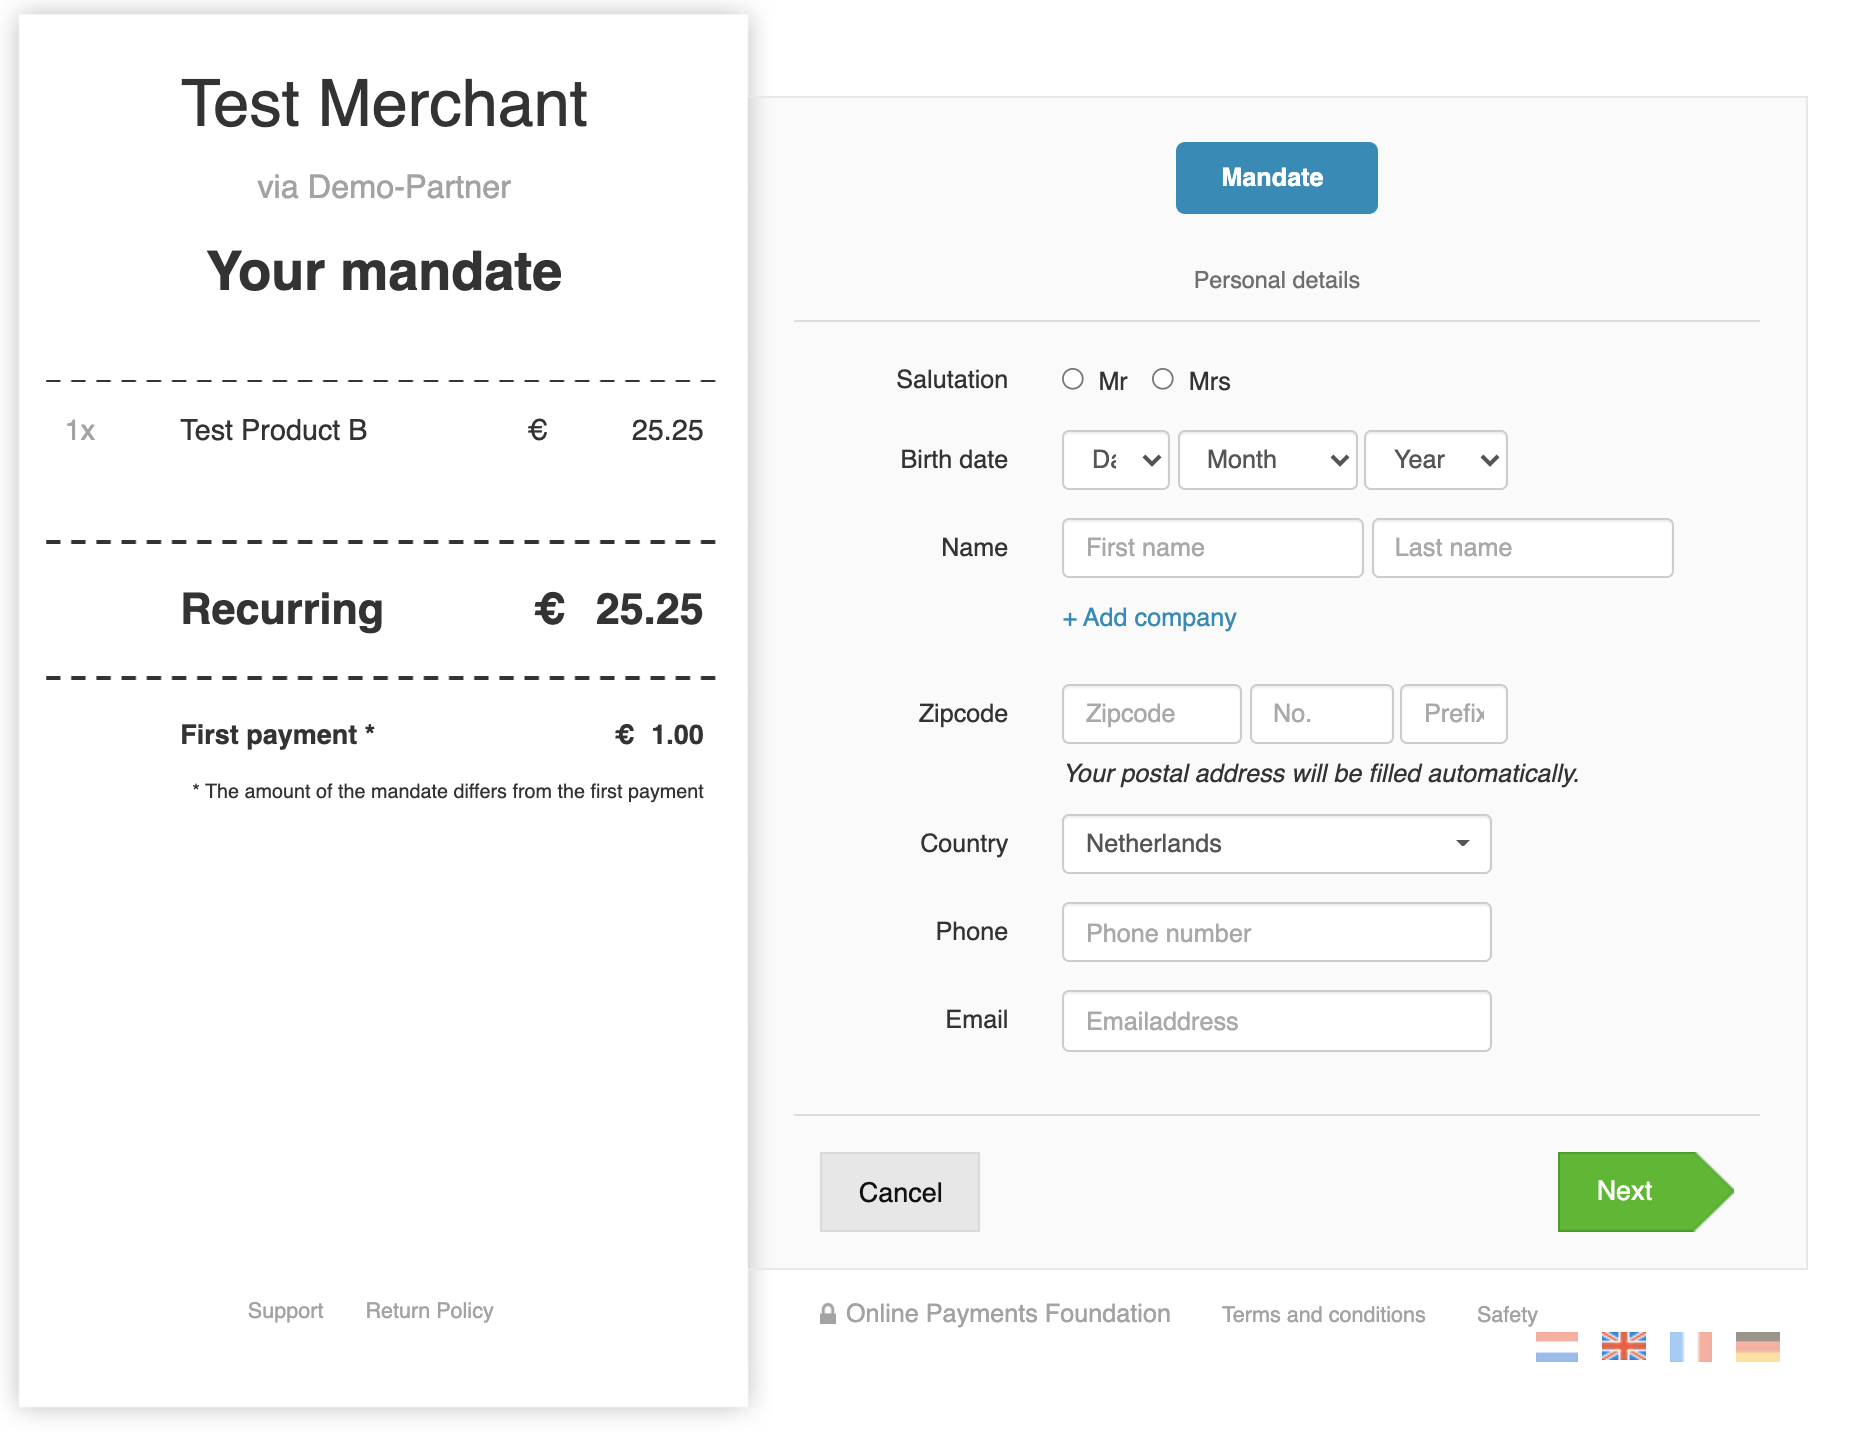
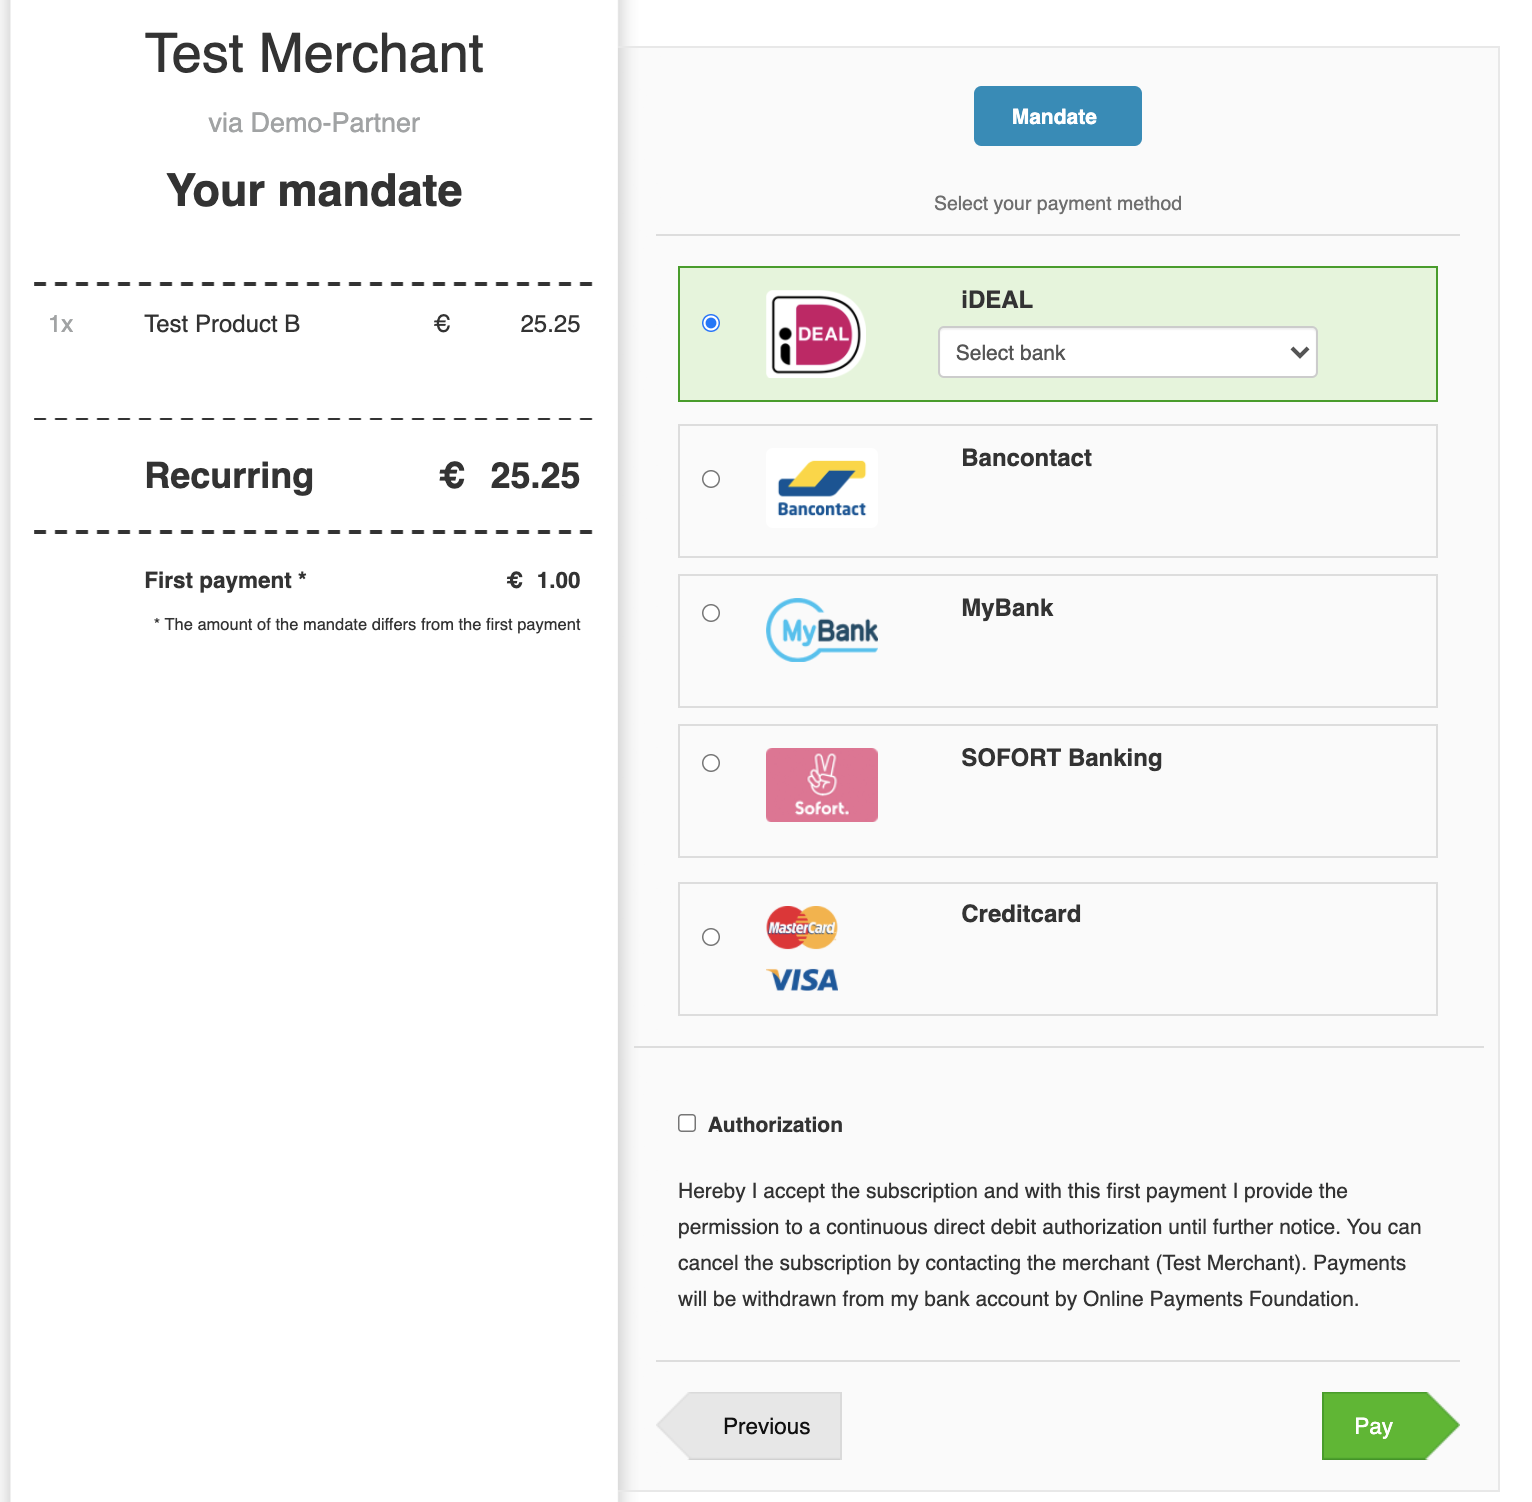
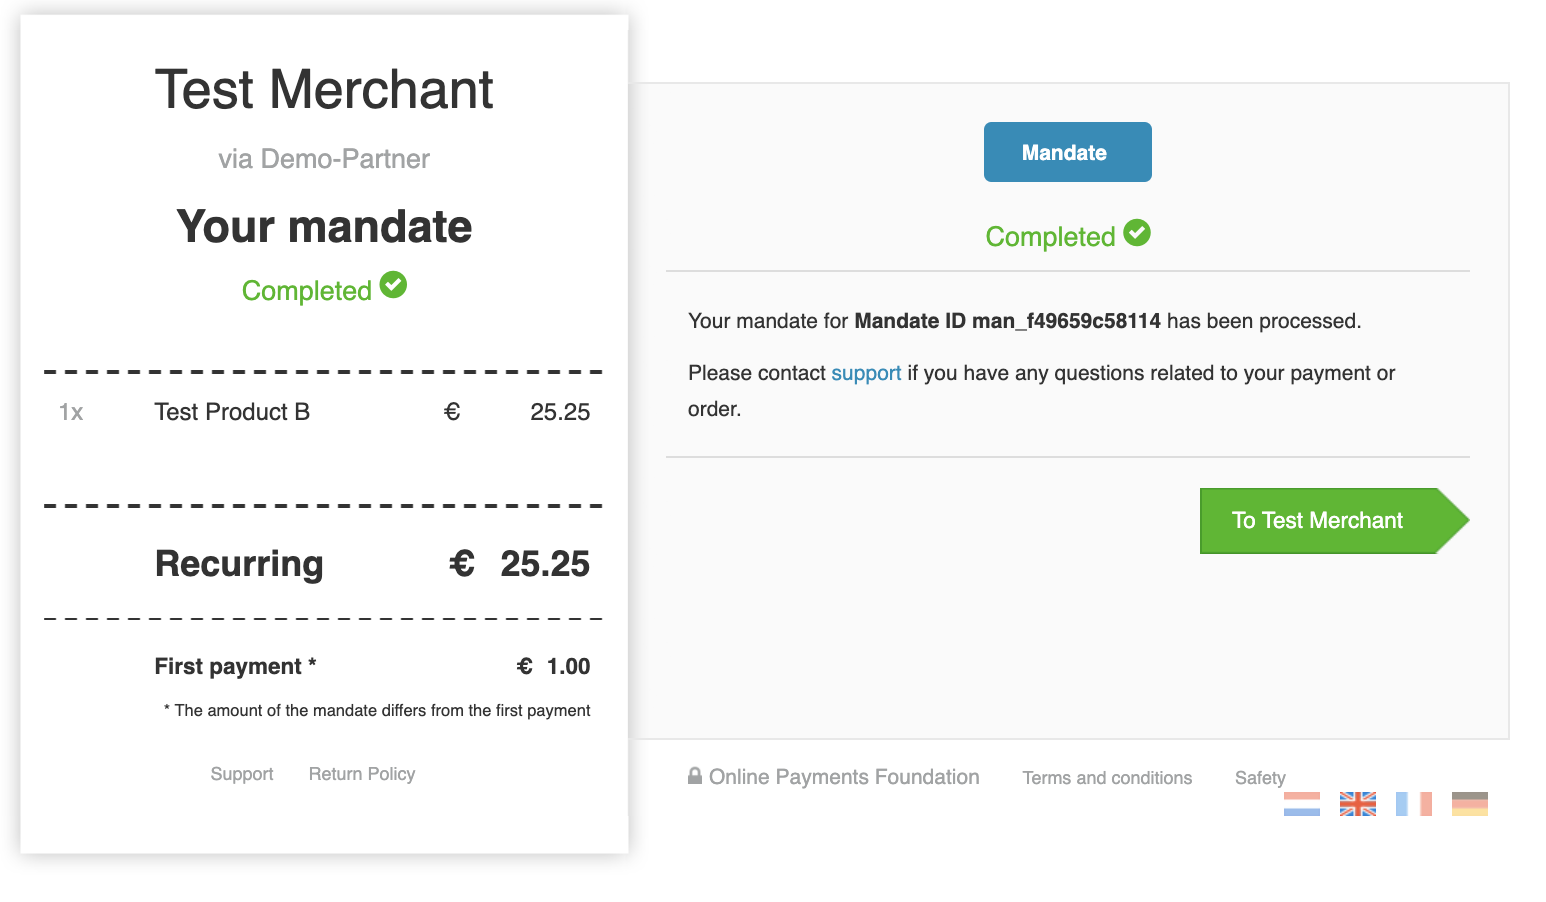
Once the user clicks the redirect_url and is redirected to either our pages or that of the acquirer, the status of the mandate will become pending.
As soon as the user is redirected to the redirect_url, you will receive a mandate.status.changed notification.
If the user has not finished the mandate flow within this time, the mandate will expire and a new mandate needs to be created.
The mandate status will then be expired, and you will again receive a mandate.status.changed notification.
After a (un)successful mandate flow, or cancellation, the user will always be redirected to the return_url.
Now that the user has been redirected to the mandate page, we need to handle the result.
3. Handle the result.
In all cases, the user will always be redirected back to the return_url.
We suggest to use the same page in all cases and handle the result as a listener on that page.
Best practise is to use a screen which shows a loader and a text like:
You're mandate is being processed.
As soon as we have a result from the acquirer or we know the flow was successful, we will send a mandate.status.changed notification to your notify_url. According to the status that you retrieve afterwards, you should show the user a page with the correct status.
{
  "uid": "{{notification_uid}}",
  "type": "mandate.status.changed",
  "created": 1634905565,
  "object_uid": "{{mandate_uid}}",
  "object_type": "mandate",
  "object_url": "https://api-sandbox.onlinebetaalplatform.nl/v1/mandates/{{mandate_uid}}",
  "verification_hash": "0483bb1b1ff60eeb48ddb19d7cc8315b90d6dc6db23665eee97caaf1c445a087"
}
There are a couple of statuses possible in this scenario:
cancelled- The user has manually cancelled the flow, perhaps because the chosen payment method was not desired. You should ask the user to try again, and create a new mandate.failed- The mandate flow has failed, for example because the user did not enter correct issuer credentials, or there was a technical error during the flo. You should ask the user to try again, and create a new mandate.expired- The user has not managed to complete the flow within the set time. You should ask the user to try again, and create a new mandate.completed- The user has succesfully completed the mandate flow. You should show a success page and lead the user further on in the process of your platform. NOTE: Thetokenhas now become available. If you retrieve the mandate, don't forget to save thetokenas well.
For all statuses, please have a look at our documentation.
Create Mandate Transaction
As soon as a mandate is completed, you can start doing transactions.
Creating a mandate transaction consists of three steps
- Create a mandate transactions.
- Handle the result.
- Handle chargebacks.
1. Create a mandate transaction.
The minimal required fields to create a mandate are: merchant_uid, token, reference, total_price and notify_url.
The notify_url is the webhook URL used by OPP for notifications of status changes.
The reference is the unique reference that belongs to this transaction. This reference should make sure that you never create a transaction for the same invoice twice.
1.1 Example request
To create a mandate, you can use the following example.
    POST https://api-sandbox.onlinebetaalplatform.nl/v1/mandates/{{mandate_uid}}/transactions
    {
        "merchant_uid": "{{merchant_uid}}",
        "reference": "ABC1234",
        "token": "{{mandate_token}}",
        "total_price": 2525,
        "notify_url": "https://platform.example.com/notify/"
    }
1.2 Example response
    {
        "livemode": false,
        "uid": "{{transaction_uid}}",
        "object": "transaction",
        "created": 1625572951,
        "updated": 1625572951,
        "completed": null,
        "merchant_uid": "{{merchant_uid}}",
        "profile_uid": "{{profile_uid}}",
        "has_checkout": false,
        "payment_method": "mandate",
        "payment_flow": "direct",
        "payment_details": {
            "reference": "ABC1234",
            "code": null,
            "message": null
        },
        "amount": 2525,
        "return_url": "https://platform.example.com/return/",
        "redirect_url": null,
        "notify_url": "https://platform.com/notify/",
        "status": "created",
        "metadata": [],
        "statuses": [],
        "order": [],
        "escrow": {},
        "fees": {},
        "refunds": {}
    }
After creating the mandate transaction you will receive a response containing the transaction_uid. The status of the mandate transaction is now created.
1.3 Actions
The mandate transaction object contains two fields that you will need to save in your database:
transaction_uid- The Transaction UID, this is the unique identifier of the created transaction.status- The transaction status.
Ofcourse, other values can be saved in your database as well, if that is preferred by you. These three values are important for the flows in your platform.
Now that you have created the mandate transaction, you will need to wait for OPP to process the mandate transaction and for the funds to arrive. Every mandate transaction somewhat follows the same timelines:
- Day 1 - Mandate transaction created by the partner.
- Day 2 (next working day) - Mandate transaction offered to the bank by OPP.
- Day 3 - 6 (working days) - Mandate transaction processed by the bank, funds received by OPP. The transaction now has status
reserved. - Day 7 - 12 (workin days) - Bank will try to retrieve the funds from the payer's bank account. In case there is not enough funds available, a chargeback will be initiated towards OPP. The transaction might then get status
chargeback. - Day 13 - 54 - Funds are retrieved from payer's bank account, but a possibility for chargebacks still exists. The status will remain
reserveduntil the agreed escrow period ends.
2. Handle the result.
As soon as we have a result from the bank, we will send a transaction.status.changed notification to your notify_url. According to the status that you retrieve afterwards, you should show inform the user about this.
{
  "uid": "{{notification_uid}}",
  "type": "transaction.status.changed",
  "created": 1621944238,
  "object_uid": "{{transaction_uid}}",
  "object_type": "transaction",
  "object_url": "https://api-sandbox.onlinebetaalplatform.nl/v1/transactions/{{transaction_uid}}",
  "verification_hash": "f81fed5c48918d81aac3aaa07ac34c99e126685ff7e77b9fedca244c50255091"
}
There are a couple of statuses possible in this scenario:
reserved- The funds have been received by OPP. The escrow period that was agreed upon has started.completed- The escrow period ended and the funds have settled towards the settlement of the merchant.chargeback- The funds have been chargebacked by the bank within the escrow period. A reason code will be available in the transaction object.refunded- The funds have been chargebacked by the bank outside of the escrow period. A reason code will be available in the transaction object. NOTE: In case the funds were already paid out towards the merchant, we will subtract the funds from your deposit.
For all statuses, please have a look at our documentation.
3. Handle chargebacks
In all cases, it is possible that chargebacks occur. Either by a payer not having enough funds available or due to one of the other reasons. Find all possible chargeback reasons here.
When a chargeback occurs, you as a platform will receive a transaction.status.changed notification to your notify_url.
{
  "uid": "{{notification_uid}}",
  "type": "transaction.status.changed",
  "created": 1621944238,
  "object_uid": "{{transaction_uid}}",
  "object_type": "transaction",
  "object_url": "https://api-sandbox.onlinebetaalplatform.nl/v1/transactions/{{transaction_uid}}",
  "verification_hash": "f81fed5c48918d81aac3aaa07ac34c99e126685ff7e77b9fedca244c50255091"
}
You will then need to handle the result depending on the status:
- chargeback
- refunded
3.1. Chargeback
If you receive a chargeback status, this means that the funds were refunded to the payer, while the money was still in escrow.
The funds will be refunded towards the payer without any concequences for the merchant or your platform deposit. You will however, need to create a new transaction to let the user pay again.
You can create a direct payment as a fallback method, using the Create Transaction.
3.2. Refunded
If you receive a refunded status, this means that the funds were refunded to the payer, while the money was not in escrow and might already have been paid out towards the merchant.
The funds will be refunded towards the payer and you will need to create a new transaction to let the user pay again.
First, you will need to find out whether the funds where already paid out towards the merchant or not. You can find out whether it was already paid out, by looping through the current settlement and see if the transaction is in there.
GET https://api-sandbox.onlinebetaalplatform.nl/v1/merchants/{{merchant_uid}}/settlements?filter[status]=current&expand[]=specifications
If that is the case, you will need to create the new transaction to top-up your deposit, otherwise, you can provide the receiver's merchant_uid.
You can create a direct payment as a fallback method, using the Create Transaction.
If however, you use recurring payments to facilitate your own platform subscriptions, you can skip this fallback method. In that case, you will receive less funds during your next payout.
Mandate Escrow
OPP always puts money received by mandate transactions in escrow. By default, this is set to a value that was agreed upon with OPP Compliance department. As a partner, you are able to influence the escrow date or period by extending or shortening the date or period. By doing this, you can somewhat give a guaranteed feeling to buyer and seller and in the meantime have more control over when the money is released to the seller. OPP will put the money in the settlement of the merchant, only when the escrow period ends, or is manually ended by you as a partner.
Creating a mandate transaction with escrow consists of three steps
- Create a mandate transaction with escrow.
- Handle the result.
- Handle chargebacks.
1. Create a mandate transaction with escrow.
The minimal required fields to create a mandate are: merchant_uid, token, reference, total_price and notify_url.
The notify_url is the webhook URL used by OPP for notifications of status changes.
The reference is the unique reference that belongs to this transaction. This reference should make sure that you never create a transaction for the same invoice twice.
1.1 Example request
To create a mandate, you can use the following example.
    POST https://api-sandbox.onlinebetaalplatform.nl/v1/mandates/{{mandate_uid}}/transactions
    {
        "merchant_uid": "{{merchant_uid}}",
        "reference": "ABC1234",
        "token": "{{mandate_token}}",
        "total_price": 2525,
        "escrow_period: 60",
        "notify_url": "https://platform.example.com/notify/"
    }
1.2 Example response
    {
        "livemode": false,
        "uid": "{{transaction_uid}}",
        "object": "transaction",
        "created": 1625572951,
        "updated": 1625572951,
        "completed": null,
        "merchant_uid": "{{merchant_uid}}",
        "profile_uid": "{{profile_uid}}",
        "has_checkout": false,
        "payment_method": "mandate",
        "payment_flow": "direct",
        "payment_details": {
            "reference": "ABC1234",
            "code": null,
            "message": null
        },
        "amount": 2525,
        "return_url": "https://platform.example.com/return/",
        "redirect_url": null,
        "notify_url": "https://platform.com/notify/",
        "status": "created",
        "metadata": [],
        "statuses": [],
        "order": [],
        "escrow": {},
        "fees": {},
        "refunds": {}
    }
After creating the mandate transaction you will receive a response containing the transaction_uid. The status of the mandate transaction is now created.
1.3 Actions
The mandate transaction object contains two fields that you will need to save in your database:
transaction_uid- The Transaction UID, this is the unique identifier of the created transaction.status- The transaction status.
Ofcourse, other values can be saved in your database as well, if that is preferred by you. These three values are important for the flows in your platform.
Now that you have created the mandate transaction, you will need to wait for OPP to process the mandate transaction and for the funds to arrive. Every mandate transaction somewhat follows the same timelines:
- Day 1 - Mandate transaction created by the partner.
- Day 2 (next working day) - Mandate transaction offered to the bank by OPP.
- Day 3 - 6 (working days) - Mandate transaction processed by the bank, funds received by OPP. The transaction now has status
reserved. - Day 7 - 12 (workin days) - Bank will try to retrieve the funds from the payer's bank account. In case there is not enough funds available, a chargeback will be initiated towards OPP. The transaction might then get status
chargeback. - Day 13 - 54 - Funds are retrieved from payer's bank account, but a possibility for chargebacks still exists. The status will remain
reserveduntil the agreed escrow period ends.
2. Handle the result.
As soon as we have a result from the bank, we will send a transaction.status.changed notification to your notify_url. According to the status that you retrieve afterwards, you should show inform the user about this.
{
  "uid": "{{notification_uid}}",
  "type": "transaction.status.changed",
  "created": 1621944238,
  "object_uid": "{{transaction_uid}}",
  "object_type": "transaction",
  "object_url": "https://api-sandbox.onlinebetaalplatform.nl/v1/transactions/{{transaction_uid}}",
  "verification_hash": "f81fed5c48918d81aac3aaa07ac34c99e126685ff7e77b9fedca244c50255091"
}
There are a couple of statuses possible in this scenario:
reserved- The funds have been received by OPP. The escrow period that was agreed upon has started.completed- The escrow period ended and the funds have settled towards the settlement of the merchant.chargeback- The funds have been chargebacked by the bank within the escrow period. A reason code will be available in the transaction object.refunded- The funds have been chargebacked by the bank outside of the escrow period. A reason code will be available in the transaction object. NOTE: In case the funds were already paid out towards the merchant, we will subtract the funds from your deposit.
For all statuses, please have a look at our documentation.
3. Handle chargebacks
In all cases, it is possible that chargebacks occur. Either by a payer not having enough funds available or due to one of the other reasons. Find all possible chargeback reasons here.
When a chargeback occurs, you as a platform will receive a transaction.status.changed notification to your notify_url.
{
  "uid": "{{notification_uid}}",
  "type": "transaction.status.changed",
  "created": 1621944238,
  "object_uid": "{{transaction_uid}}",
  "object_type": "transaction",
  "object_url": "https://api-sandbox.onlinebetaalplatform.nl/v1/transactions/{{transaction_uid}}",
  "verification_hash": "f81fed5c48918d81aac3aaa07ac34c99e126685ff7e77b9fedca244c50255091"
}
You will then need to handle the result depending on the status:
- chargeback
- refunded
3.1. Chargeback
If you receive a chargeback status, this means that the funds were refunded to the payer, while the money was still in escrow.
The funds will be refunded towards the payer without any concequences for the merchant or your platform deposit. You will however, need to create a new transaction to let the user pay again.
You can create a direct payment as a fallback method, using the Create Transaction.
3.2. Refunded
If you receive a refunded status, this means that the funds were refunded to the payer, while the money was not in escrow and might already have been paid out towards the merchant.
The funds will be refunded towards the payer and you will need to create a new transaction to let the user pay again.
First, you will need to find out whether the funds where already paid out towards the merchant or not. You can find out whether it was already paid out, by looping through the current settlement and see if the transaction is in there.
GET https://api-sandbox.onlinebetaalplatform.nl/v1/merchants/{{merchant_uid}}/settlements?filter[status]=current&expand[]=specifications
If that is the case, you will need to create the new transaction to top-up your deposit, otherwise, you can provide the receiver's merchant_uid.
You can create a direct payment as a fallback method, using the Create Transaction.
If however, you use recurring payments to facilitate your own platform subscriptions, you can skip this fallback method. In that case, you will receive less funds during your next payout.
Releasing the funds
Normally, the funds are automatically released when the escrow_period or escrow_date ends.
In case you want to manually end the escrow, for example when the product was delivered to and accepted by the buyer, you can do so by updating the escrow_date to any time between the agreed minimum period and now.
POST https://api-sandbox.onlinebetaalplatform.nl/v1/transactions/{{transaction_uid}}
{
    {
        "escrow_date": "2021-04-30 09:00:00"
    }
}
You will receive a notification transaction.status.changed. The transaction will now have status completed, and be settled on the settlement of the merchant.
Once the transaction is out of escrow, the partner_fee will become available and the transaction costs for this transaction will be charged.
Extending the escrow
In case you want to extend the current escrow period, because for example a dispute is created, you can do so by updating the escrow_date to any time in the future that suites your needs. Our advise would be to extend it no longer then three months.
POST https://api-sandbox.onlinebetaalplatform.nl/v1/transactions/{{transaction_uid}}
{
    {
        "escrow_date": "2021-04-30 09:00:00"
    }
}
Please note that the standard maximum escrow period is 365 days. In case you need a longer period of time, please contact your Implementation Manager.
Dashboard
Every partner has their own wishes and demands of what a correct dashboard looks like and which information it should contain. Because of this reason, we always advise our partners to build an own dashboard for merchants and for yourself. This has two great benefits:
- You and your merchants do not have to leave the platform.
- The information is visible in the exact way you want to.
OPP always provides the possibility to use the dashboard created by OPP for you and your merchants, but experience teaches us that partners like the benefits and freedom of their own dashboard. The dashboard created by OPP is also built on our own APIs. Therefore, anything found in the dashboards of OPP can be retrieved via our APIs.
We distinguish three differences:
- Merchant profile - What information of the merchant account should be visible?
- Merchant dashboard - What information about transactions and payouts should be visible?
- Partner dashboard - What information about merchants, transactions and payouts should be visible?
Merchant Profile
Besides all the information that your platform whishes to show on a profile page (like avatar, nickname, password management, etc), we advise you to take several of the OPP flows into consideration. We advise you to show the following on the merchant profile:
- Merchant status
- Merchant Compliance status
- Outstanding merchant compliance requirements
- The current IBAN used for payouts
- Change IBAN for payouts
Merchant information
Merchant status
You can retrieve the merchant status of the merchant using the following call.
GET https://api-sandbox.onlinebetaalplatform.nl/v1/merchants/{{merchant_uid}}
The status that can be found in the response is the merchant account status. Different meanings of the merchant status can be found here. Please note that you should have saved the merchant status in your database, so a GET request should not be necessary every time a merchant reaches his/her profile page.
{
    "uid": "{{merchant_uid}}",
    "object": "merchant",
    "created": 1554113700,
    "updated": 1554113700,
    "status": "live",
    "compliance": {
        "level": 400,
        "status": "unverified",
        "overview_url": "https://sandbox.onlinebetaalplatform.nl/en/{{partner_slug}}/{{merchant_uid}}/{{hash}}/overview",
        "requirements": [
            {
                "type": "contact.phonenumber.required",
                "status": "unverified",
                "object_type": "contact_phonenumber",
                "object_uid": null,
                "object_url": null,
                "object_redirect_url": "https://sandbox.onlinebetaalplatform.nl/en/{{partner_slug}}/merchants/{{merchant_uid}}/verifications/phonenumber-form/{{contact_uid}}/{{hash}}"
            },
            {
                "type": "contact.verification.required",
                "status": "unverified",
                "object_type": "contact",
                "object_uid": "{{contact_uid}}",
                "object_url": "https://api-sandbox.onlinebetaalplatform.nl/v1/merchants/{{merchant_uid}}/contacts/{{contact_uid}}",
                "object_redirect_url": "https://sandbox.onlinebetaalplatform.nl/en/{{partner_slug}}/merchants/{{merchant_uid}}/verifications/contact-details/{{contact_uid}}/{{hash}}"
            }
        ]
    },
...
}
Merchant Compliance
You can retrieve the merchant compliance status of the merchant by retrieving the merchant object.
The compliance object withing the merchant object contains a status. This is the merchant compliance status, and shows whether the merchant is compliant and allowed to receive payouts.
Different meanings of the merchant compliance status can be found here. Please note that you should have saved the merchant compliance status in your database, so a GET request should not be necessary every time a merchant reaches his/her profile page.
Merchant Compliance Requirements
In case the Merchant Compliance status is not verified, you should show the outstanding compliance requirements.
Retrieve the merchant object, and find the compliance object. Within this object, you will find the requirements array. All possible requirements can be found here.
Once you have retrieved the merchant object, the merchant can then choose to fulfill outstanding using his/her overview_url, or by using the object_redirect_url in the outstanding requirement.
Bank Account
Current IBAN We strongly advise you to show the current IBAN that is used for payouts, so that merchants always see what bank account of theirs is connected to our platform. You can find the currently connected IBAN by retrieving the merchant's profile. Unless the merchant is a company that has multiple affiliates which need seperated payouts, a merchant will only have one profile.
Find the profile's bank_account, using
GET https://api-sandbox.onlinebetaalplatform.nl/v1/merchants/{{merchant_uid}}?expand[]=profiles.bank_account
In the profiles object, find the first profile and find the bank_account object.
Within this object, you will find the account, which shows a masked account_iban and account_name.
These values are the current bank account details that are used for the merchant's payouts.
    {
    "livemode": true,
    "uid": "{{merchant_uid}}",
    "object": "merchant",
    ...
    "profiles": [
        {
            "uid": "{{profile_uid}}",
            "object": "profile",
            "created": 1602071644,
            "updated": 1602071769,
            ...
            },
            "bank_account": {
                "uid": "{{bank_account_uid}}",
                "object": "bank_account",
                ...
                "status": "approved",
                "account": {
                    "account_iban": "NL12***********123",
                    "account_name": "John Tester"
                },
                "bank": {
                    "bic": "{{BIC}}"
                },
                ...
            },
            ...
        }
    ],
...
}
Change IBAN
Occasionally, merchants would like to change their IBAN for payouts, because of many reasons. Research has shown us that many partners get these questions, and forward them to the OPP support team. You can create a button to change the IBAN account for payouts as follows.
Please note that whenever a new bank_account is created, the old bank_account cannot be used for payouts anymore. In case the merchant has second thoughts, and does want the first bank_account for payouts, (s)he will have to verify it again.
Step 1: Check whether the merchant has a bank_account with status new
First, we must find out whether the merchant already has a bank_account that can be filled. This is an important step, to keep your, and our database free of noise. Besides that, every time a new bank_account is created, the old bank_account will not be used for payouts anymore. This means that eventually, the merchant could not have a connected IBAN at all, if we do not keep track.
Find the merchant bank_accounts, and filter the status new by using the following call:
GET https://api-sandbox.onlinebetaalplatform.nl/v1/merchants/{{merchant_uid}}/bank_accounts?filter[status]=new
Step 2.1: Merchant already has an outstanding bank_account
Get the bank_account with status new, and redirect the user to the verification_url.
    {
    "uid": "{{bank_account_uid}}",
    "object": "bank_account",
    "created": 1554200096,
    "updated": 1554200096,
    "verified": null
    "verification_url": "https://onlinebetaalplatform.nl/nl/
     {{partner_name}}/merchants/{{merchant_uid}}/verificatie/
     bankgegevens/{{bank_account_uid}}/7a8d3c308b0739ef96320720017d070533912548",
    "status": "new",
    ...
}
After the merchant has gone through the process, you will receive a notification with type bank_account.status.changed. The status is now pending.
After our compliance department has checked the new bank_account, you will again receive a notification with type bank_account.status.changed.
This can either be approved, or disapproved. When approved, the bank_account will be used for payouts.
Step 2.2: Merchant has no outstanding bank_account
Create a new bank_account, as described in the Docs. Then redirect the user to the verification_url.
After the merchant has gone through the process, you will receive a notification with type bank_account.status.changed. The status is now pending.
After our compliance department has checked the new bank_account, you will again receive a notification with type bank_account.status.changed.
This can either be approved, or disapproved. When approved, the bank_account will be used for payouts.
Merchant Dashboard
When providing payments on your platform, merchants would like to know what happens to their orders and payments, and what funds are available for payouts. In this chapter, we will guide you through providing all information that is required to build your own dashboard for the merchant. This dashboard consists of two parts:
- Settlements
- Transactions
In this guide, we assume that you have registered all refund_uid’s and transaction_uid’s in your database, in order to relate them to the correct bookings and other related data.
Settlements
A settlement is the (current) balance of a merchant over a specific period of time. Settlement periods can be daily, weekly, or monthly. Every settlement has a specification for every profile a merchant has. Unless the merchant is a company with multiple affiliates which need seperated payouts, a merchant will only have one profile and thus one specification.
The current settlement can be found using:
GET https://api-sandbox.onlinebetaalplatform.nl/v1/merchants/{{merchant_uid}}/settlements?filter[status]=current&expand[]=specifications
If the merchant has no current settlement, the server will respond with an empty list.
Every specification has its own specification_uid. The specification is build up the same way as a settlement is. In case you want to specify the dashboard per profile, it is important to look at the different specifications, instead of the complete settlement.
Important in this response is:
- period_end - The timestamp on which the settlement ends. After the settlement ends, it will be made available for payout.
- total_number_of_transactions - The total number of transactions, including refunds, mandates, etc. This is the sum of everything that has happened on the merchant settlement.
- amount_payable - The current balance, or the amount that is to be paid out.
A response might look like this:
{
    "object": "list",
    "url": "/v1/merchants/{{merchant_uid}}/settlements",
    "has_more": false,
    "total_item_count": 1,
    "items_per_page": 10,
    "current_page": 1,
    "last_page": 1,
    "data": [
        {
            "uid": "{{settlement_uid}}",
            "object": "settlement",
            "created": 1606307019,
            "updated": 1606307020,
            "status": "current",
            "paid": null,
            "period_start": 1606258800,
            "period_end": 1606345199,
            "total_number_of_transactions": 2,
            "number_of_transactions": 1,
            "number_of_refunds": 1,
            "number_of_withdrawals": 0,
            "number_of_mandates": 0,
            "number_of_internal_transfers": 0,
            "number_of_multi_transactions": 0,
            "total_volume": 80,
            "transaction_volume": 100,
            "refund_volume": -20,
            "withdrawal_volume": 0,
            "mandate_volume": 0,
            "internal_transfer_volume": 0,
            "multi_transaction_volume": 0,
            "total_transaction_costs": 0,
            "transaction_costs": 0,
            "refund_costs": 0,
            "withdrawal_costs": 0,
            "mandate_costs": 0,
            "internal_transfer_costs": 0,
            "multi_transaction_costs": 0,
            "total_order_fees": 0,
            "total_refund_fees": 0,
            "total_gateway_fees": 0,
            "total_amount": 80,
            "amount_paid": 0,
            "amount_payable": 80,
            "payout_type": "collective",
            "po_number": null,
            "specifications": [
                {
                    "uid": "{{specification_uid}}",
                    "object": "specification",
                    "created": 1606307019,
                    "updated": 1606307020,
                    "source": {},
                    "status": "current",
                    "paid": null,
                    "period_start": 1606258800,
                    "period_end": 1606345199,
                    "total_number_of_transactions": 2,
                    "number_of_transactions": 1,
                    "number_of_refunds": 1,
                    "number_of_withdrawals": 0,
                    "number_of_mandates": 0,
                    "number_of_internal_transfers": 0,
                    "number_of_multi_transactions": 0,
                    "total_volume": 80,
                    "transaction_volume": 100,
                    "refund_volume": -20,
                    "withdrawal_volume": 0,
                    "mandate_volume": 0,
                    "internal_transfer_volume": 0,
                    "multi_transaction_volume": 0,
                    "total_transaction_costs": 0,
                    "transaction_costs": 0,
                    "refund_costs": 0,
                    "withdrawal_costs": 0,
                    "mandate_costs": 0,
                    "internal_transfer_costs": 0,
                    "multi_transaction_costs": 0,
                    "total_order_fees": 0,
                    "total_refund_fees": 0,
                    "total_gateway_fees": 0,
                    "total_amount": 80,
                    "amount_paid": 0,
                    "amount_payable": 80,
                    "po_number": null
                }
            ]
        }
    ]
}
All previous settlements can be found using the following call:
GET https://api-sandbox.onlinebetaalplatform.nl/v1/merchants/{{merchant_uid}}/settlements?expand[]=specifications&order[]=-period
With &order[]=-period we order the response to view the settlement with the most recent period_end to be the first result.
Accountancy information
Aside from the above information, merchants would like to know what their payouts consist of, so that they can process this in their accountancy. Unless you have contractually decided to provide individual payouts, every payout contains the following text on the bank statement:
Betaling settlement {{specification_uid}} {{merchant_name}} periode 01-12-2019 - 01-12-2019
On request, OPP can change this text. Keep in mind that this payout text is for all merchants on your platform. The following tags can be used in the settlement payout description:
- settlement_uid
- settlement_date_end
- partner_name
- merchant_name
- merchant_profile_name
We would advise you to create an export of the necessary information for merchants to be able to download.
Having the settlement_uid and specification_uid we can retrieve an overview of every event within the specification with the following call:
GET https://api-sandbox.onlinebetaalplatform.nl/v1/merchants/{{merchant_uid}}/settlements/{{settlement_uid}}/specifications/{{specificiation_uid}}/rows
The response shows al settlement specification rows. Important in this row is:
- type - The type of the event. This can be
transaction,refund,chargeback,mandate - reference - The object UID, e.g. the transaction_uid that belongs to this specification event.
- fees - The fees paid by the merchant and the partner, in case you want to show this information.
total_merchant_feeis the fee of the event that is paid to the partner.total_partner_feeis the fee of the event that is paid by the partner to OPP.
{
    "object": "list",
    "url": "/v1/merchants/{{merchant_uid}}/settlements/{{settlement_uid}}/specifications/{{specification_uid}}/rows",
    "has_more": false,
    "total_item_count": 2,
    "items_per_page": 10,
    "current_page": 1,
    "last_page": 1,
    "data": [
        {
            "object": "settlement_row",
            "created": 1606306677,
            "updated": 1606306677,
            "date": 1606306674,
            "type": "transaction",
            "reference": "{{transaction_uid}}",
            "volume": 100,
            "fees": {
                "total_merchant_fee": 50,
                "total_partner_fee": 40,
                ...
            },
            "amount": 100,
            "amount_paid": 0,
            "amount_payable": 100
        },
        {
            "object": "settlement_row",
            "created": 1606307020,
            "updated": 1606307020,
            "date": 1606307016,
            "type": "refund",
            "reference": "{{refund_uid}}",
            "volume": -20,
            "fees": {
                "total_merchant_fee": 0,
                "total_partner_fee": 100,
                ...
            },
            "amount": -20,
            "amount_paid": 0,
            "amount_payable": -20
        }
    ]
}
In case a "type": "refund" is found, which does not match with a transaction in the same specification, you can find the transaction to which this refund belongs by the following call:
GET https://api-sandbox.onlinebetaalplatform.nl/v1/transactions?filter[refund_uid]={{refund_uid}}
Transactions
If you want to show a merchant all transactions that have been done, you can use the following call. This example shows all transactions of a merchant that have status completed or reserved. If desired, the filter can be expanded with other statuses to show for example, pending statuses.
GET https://api-sandbox.onlinebetaalplatform.nl/v1/merchants/{{merchant_uid}}/transactions?filter[0][name]=status&filter[0][operand]=in&filter[0][value]=completed,reserved
If you want to show all completed and reserved transactions within a certain period of time, you can expand the filter to also filter on a date.
GET https://api-sandbox.onlinebetaalplatform.nl/v1/merchants/{{merchant_uid}}/transactions?filter[0][name]=status&filter[0][operand]=in&filter[0][value]=completed,reserved&filter[1][name]=date_completed&filter[1][operand]=between&filter[1][value]=2020-11-01 00:00:00, 2020-11-30 23:59:59
A transaction can contain one or more refunds. Refunds belonging to a transaction can be found as follows:
GET https://api-sandbox.onlinebetaalplatform.nl/v1/transactions/{{transaction_uid}}/refunds
Do note that we expect you to save all transaction_uids and refund_uids that belong to an order, so filtering and ordering could also be done on your own data.
Partner Dashboard
When providing payments on your platform, you would like to know what happens to their orders and payments. Besides that, it is wise for you to know what happens to your fee and how much you pay for transactions, refunds, mandates, etc.
In this chapter, we will guide you through providing all information that is required to build your own dashboard.
In this guide, we assume that you have registered all refund_uid’s and transaction_uid’s in your database, in order to relate them to the correct bookings and other related data.
Al your monthly fee is combined into a settlement. A settlement is the (current) balance over a specific period of time. Every settlement has a specification for every merchant your platform has. This way you can see exactly how much you earn from specific merchants.
The current settlement can be found using:
GET https://api-sandbox.onlinebetaalplatform.nl/v1/settlements?filter[status]=current&expand[]=specifications
If you do not have a current settlement, the server will respond with an empty list.
Every specification has its own specification_uid. The specification is build up the same way as a settlement is. In case you want to specify the dashboard per merchant, it is important to look at the different specifications, instead of the complete settlement.
Important in this response is:
- period_end - The timestamp on which the settlement ends. After the settlement ends, it will be made available for payout.
- total_number_of_transactions - The total number of transactions, including refunds, mandates, etc. This is the sum of everything that has happened on the merchant settlement.
- amount_payable - The current balance, or the amount that is to be paid out.
A response might look like this:
{
    "object": "list",
    "url": "/v1/settlements",
    "has_more": false,
    "total_item_count": 1,
    "items_per_page": 10,
    "current_page": 1,
    "last_page": 1,
    "data": [
        {
            "uid": "{{settlement_uid}}",
            "object": "settlement",
            "created": 1606307019,
            "updated": 1606307020,
            "status": "current",
            "paid": null,
            "period_start": 1606258800,
            "period_end": 1606345199,
            "total_number_of_transactions": 72,
            "number_of_transactions": 47,
            "number_of_refunds": 3,
            "number_of_withdrawals": 0,
            "number_of_mandates": 20,
            "number_of_internal_transfers": 0,
            "number_of_multi_transactions": 2,
            "total_volume": 685188,
            "transaction_volume": 686218,
            "refund_volume": -1030,
            "withdrawal_volume": 0,
            "mandate_volume": 0,
            "internal_transfer_volume": 0,
            "multi_transaction_volume": 0,
            "total_transaction_costs": -4285,
            "transaction_costs": -435,
            "refund_costs": 0,
            "withdrawal_costs": 0,
            "mandate_costs": -3850,
            "internal_transfer_costs": 0,
            "multi_transaction_costs": 0,
            "total_order_fees": 0,
            "total_refund_fees": 0,
            "total_gateway_fees": 0,
            "total_amount": 80,
            "amount_paid": 0,
            "amount_payable": -4442,
            "payout_type": "collective",
            "po_number": null,
            "specifications": [
                {
                    "uid": "set_8751fc4fb25f",
                    "object": "specification",
                    "created": 1606386063,
                    "updated": 1606386064,
                    "source": {},
                    "status": "current",
                    "paid": null,
                    "period_start": 1604358000,
                    "period_end": 1606777199,
                    "total_number_of_transactions": 35,
                    "number_of_transactions": 12,
                    "number_of_refunds": 1,
                    "number_of_withdrawals": 0,
                    "number_of_mandates": 20,
                    "number_of_internal_transfers": 0,
                    "number_of_multi_transactions": 2,
                    "total_volume": 33078,
                    "transaction_volume": 34078,
                    "refund_volume": -1000,
                    "withdrawal_volume": 0,
                    "mandate_volume": 0,
                    "internal_transfer_volume": 0,
                    "multi_transaction_volume": 0,
                    "total_transaction_costs": -3910,
                    "transaction_costs": -60,
                    "refund_costs": 0,
                    "withdrawal_costs": 0,
                    "mandate_costs": -3850,
                    "internal_transfer_costs": 0,
                    "multi_transaction_costs": 0,
                    "total_order_fees": 398,
                    "total_refund_fees": -100,
                    "total_gateway_fees": -650,
                    "total_amount": 188,
                    "amount_paid": 0,
                    "amount_payable": -4262,
                    "po_number": null
                },
                ...
            ]
        }
    ]
}
All previous settlements can be found using the following call:
GET https://api-sandbox.onlinebetaalplatform.nl/v1/settlements?expand[]=specifications&order[]=-period
With &order[]=-period we order the response to view the settlement with the most recent period_end to be the first result.
The set_xxx code, is also visible on your bank statement of that specific period. Your bank statement will look something like this:
Betaling settlement {{settlement_uid}} {{partner_name}} periode 01-12-2019 - 31-12-2019
Aside from the above information, you might want to know what your payouts consist of, so that you can process this in your accountancy. Every payout contains the following text on the bank statement:
We would advise you to create an export of the necessary information for you to be able to download.
Having the settlement_uid and specification_uid you can retrieve an overview of every event within the specification with the following call:
GET https://api-sandbox.onlinebetaalplatform.nl/v1/settlements/{{settlement_uid}}/specifications/{{specificiation_uid}}/rows
The response shows al settlement specification rows. Important in this row is:
- type - The type of the event. This can be
transaction,refund,chargeback,mandate - reference - The object UID, e.g. the transaction_uid that belongs to this specification event.
- total_partner_fee - The fee paid by you to OPP.
The sum of all amount_payable in the specifications adds up to the amount_payable of the settlement, and is the amount that you will receive on your bank account.
{
    "object": "list",
    "url": "/v1/merchants/{{merchant_uid}}/settlements/{{settlement_uid}}/specifications/{{specification_uid}}/rows",
    "has_more": false,
    "total_item_count": 2,
    "items_per_page": 10,
    "current_page": 1,
    "last_page": 1,
    "data": [
        {
            "object": "settlement_row",
            "created": 1606306677,
            "updated": 1606306677,
            "date": 1606306674,
            "type": "transaction",
            "reference": "{{transaction_uid}}",
            "volume": 100,
            "fees": {
                "total_merchant_fee": 0,
                "total_partner_fee": 40,
                ...
            },
            "amount": 40,
            "amount_paid": 0,
            "amount_payable": 40
        },
        {
            "object": "settlement_row",
            "created": 1606307020,
            "updated": 1606307020,
            "date": 1606307016,
            "type": "refund",
            "reference": "{{refund_uid}}",
            "volume": -20,
            "fees": {
                "total_merchant_fee": 0,
                "total_partner_fee": 100,
                ...
            },
            "amount": -20,
            "amount_paid": 0,
            "amount_payable": -20
        }
    ]
}
In case a "type": "refund" is found, which does not match with a transaction in the same specification, you can find the transaction to which this refund belongs by the following call:
GET https://api-sandbox.onlinebetaalplatform.nl/v1/transactions?filter[refund_uid]={{refund_uid}}